Countdown timers are one of the simplest yet most effective ways to boost urgency, drive conversions, and make your Shopify store feel more dynamic. If you’re running a flash sale, launching a new product, or creating a limited-time offer, a countdown timer will give your visitors a reason to “act now, not later”.
Most merchants think they need to install a separate app (often paid) to add a countdown timer. But what if we told you there’s a way to add one for free, without slowing down your store?
In this post, we’ll show you exactly how to add a free Shopify countdown timer to your online store, along with real examples of how it looks in action.
Table of Contents
Why Add a Countdown Timer to Your Shopify Store?
A countdown timer is more than just a ticking clock — it’s a powerful psychological trigger that taps into the fear of missing out (FOMO). When used strategically, it can have a real impact on customer behavior and your store’s conversion rates.
Here’s what a countdown timer can help you achieve:
- Create urgency around sales and limited-time deals: Seeing a timer tick down tells customers they don’t have forever to decide. It pushes them to take action now rather than putting off the purchase until later (or never).
- Encourage faster decision-making: Shoppers can be indecisive, especially when browsing multiple stores. A countdown timer gives them a reason to stop thinking and start buying—before the deal is gone.
- Highlight restocks, product launches, or time-sensitive offers: Whether you’re bringing back a sold-out favorite or launching something new, a countdown can build excitement and anticipation. It helps you turn these moments into real sales events.
- Make your store feel more dynamic and engaging: A timer adds movement and urgency to your pages, making your store feel active and alive. This can help draw attention to key offers and guide customers toward taking action.
How to Add a Countdown Timer to Your Shopify Store
Install a Countdown Timer App
One of the easiest ways to add a countdown timer to your Shopify store is by using an app. There are many apps out there offering advanced timer features to help drive urgency and boost sales. However, most of them come with paid plans, and some may even slow down your store.
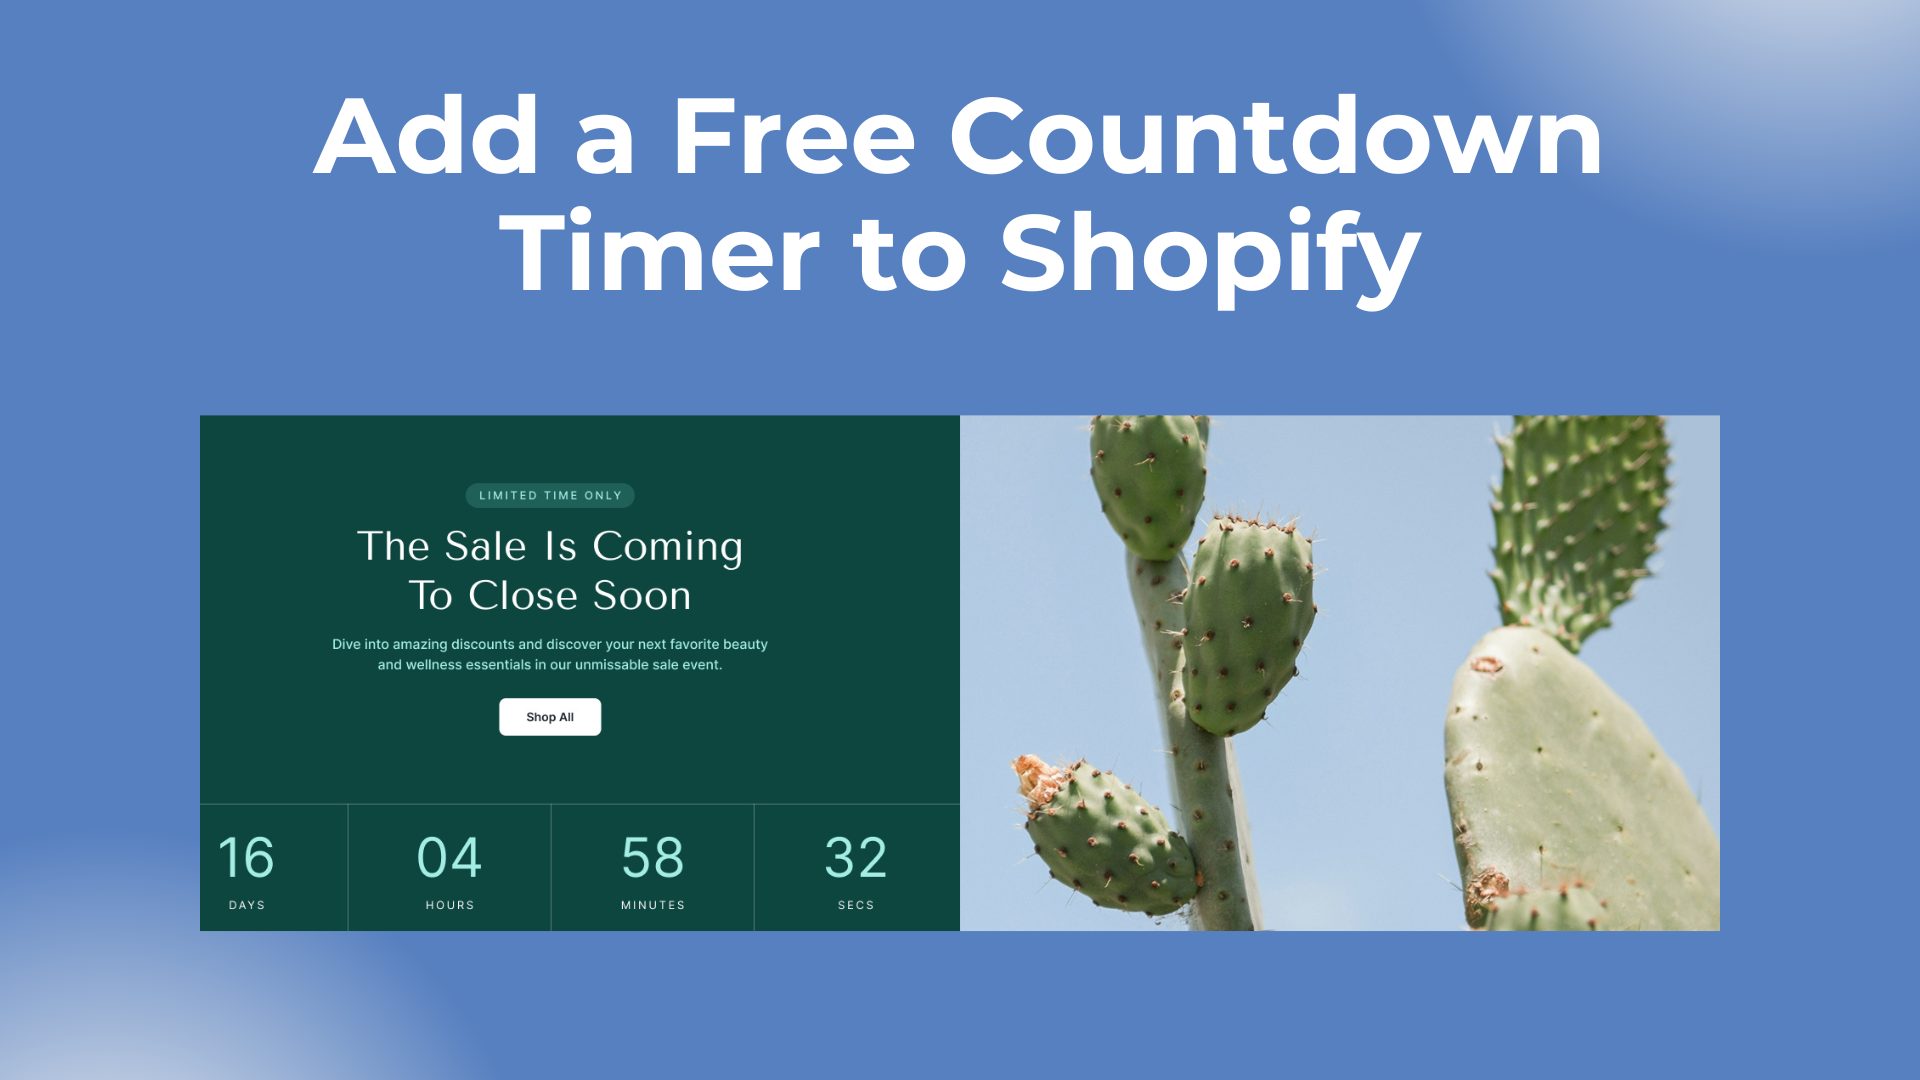
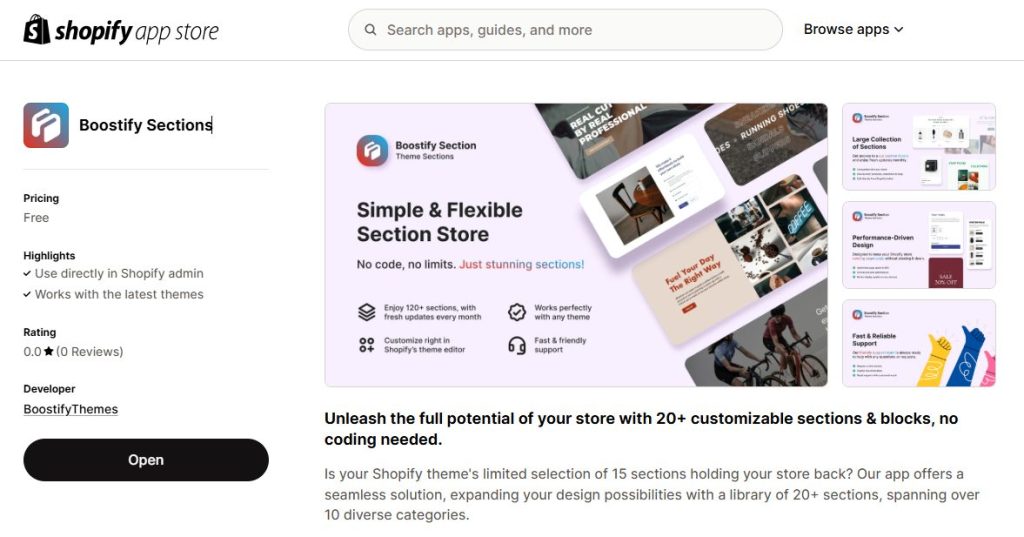
If you’re looking for a free, lightweight, and powerful alternative, Boostify Sections is an excellent choice. It’s a completely free design app that lets you add a countdown timer—along with many other customizable sections—to your store with just a few clicks. The Countdown section in Boostify Sections is built to create urgency and encourage customers to complete their purchases faster. It’s easy to set up, fully responsive, and works seamlessly on any page—whether it’s your homepage, product page, or a special landing page.
Key features include:
- Real-time countdown timer: Add a live timer to highlight sales, product launches, or limited-time offers.
- Customizable content and layout: Edit the heading, subheading, button, and choose between layout styles.
- Easy styling options: Adjust colors, fonts, and spacing to match your brand.
- Mobile-friendly: Fully responsive across all devices.
- No code needed: Install and configure it with just a few clicks in the Shopify Theme Editor — no technical skills required.
But that’s not all. Boostify Sections goes far beyond countdown timers. The app also includes a wide variety of useful, high-converting sections, including Image Collage, Feature Box, Testimonials, Lookbook, Promotional Banners, FAQs, and more.
You may be interested in exploring 10+ Best Shopify Apps to Increase Sales.
Use Boostify Sections to Add a Free Shopify Countdown Timer
Boostify Sections offers a growing library of free, professionally designed sections, including a countdown timer. Here’s how to add it to your store:
- Step 1: Install Boostify Sections
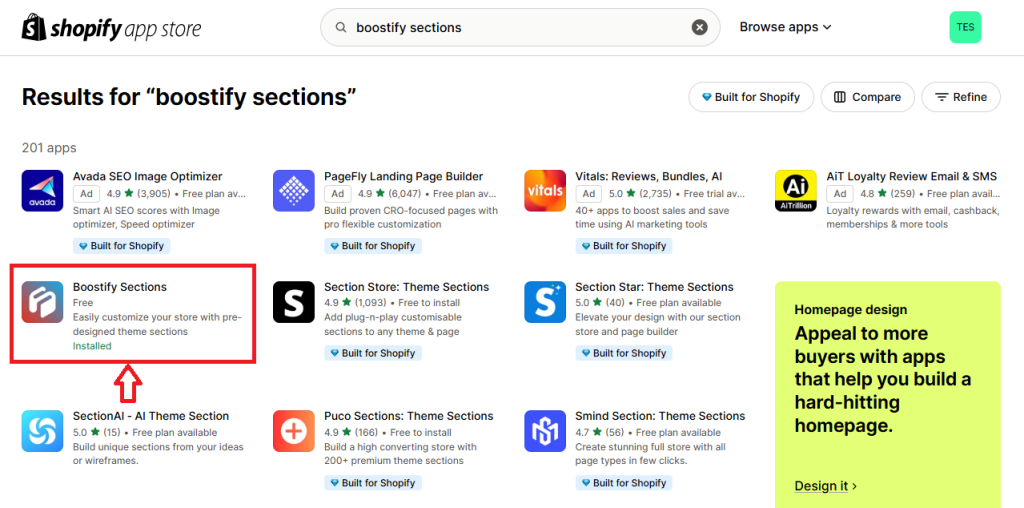
You can easily find Boostify Sections in the Shopify App Store. Install it to use. It’s completely free.
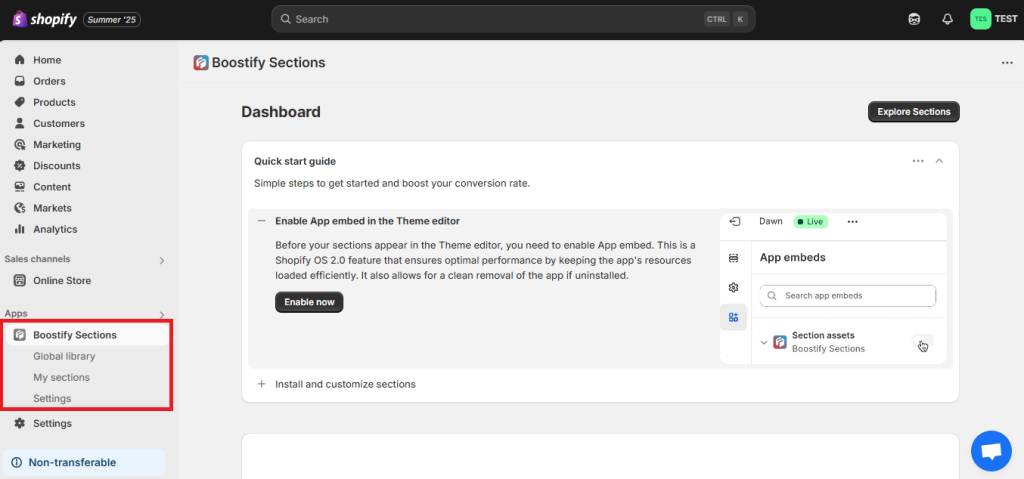
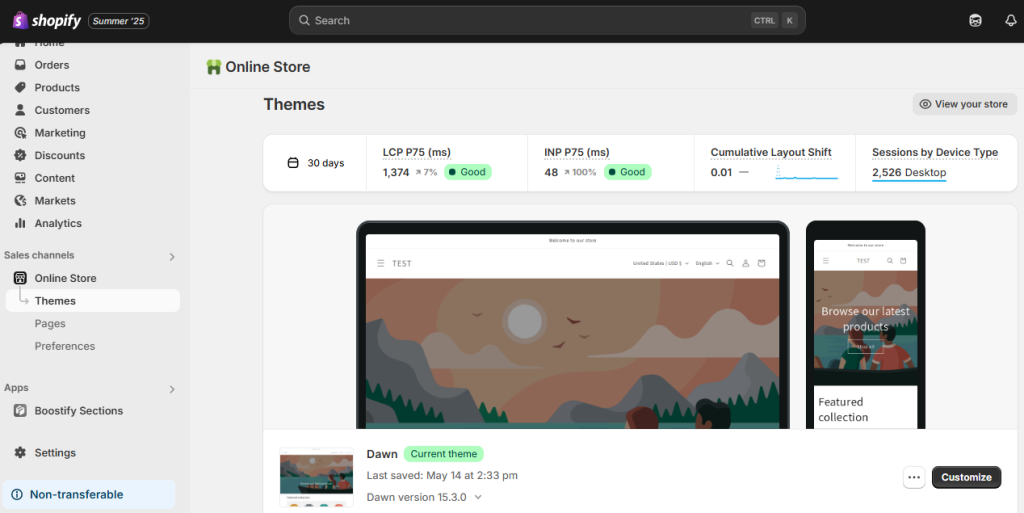
- Step 2: Access your Shopify Theme Customizer
In the theme customizer, you’ll see Boostify Sections in the App tab.
- Step 3: Install the Countdown Section
From Boostify Sections, visit the “My Section” tab and click “Install your first section”.
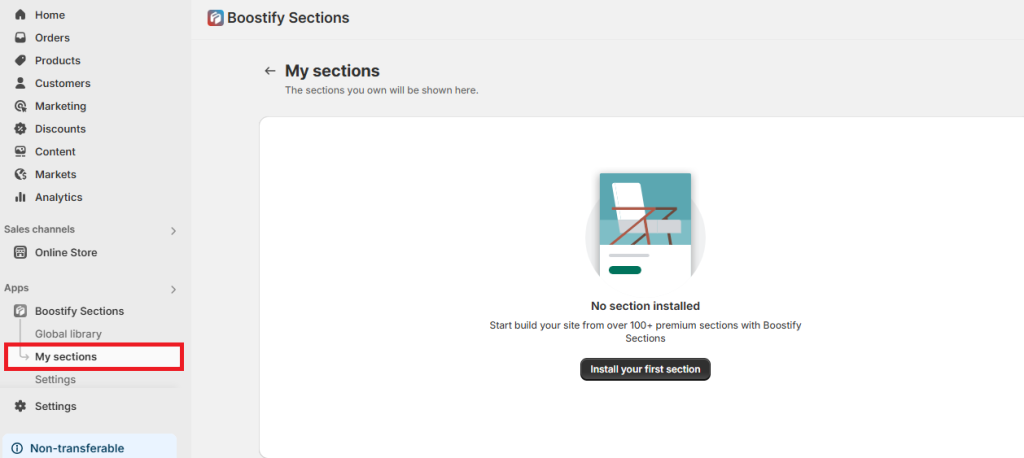
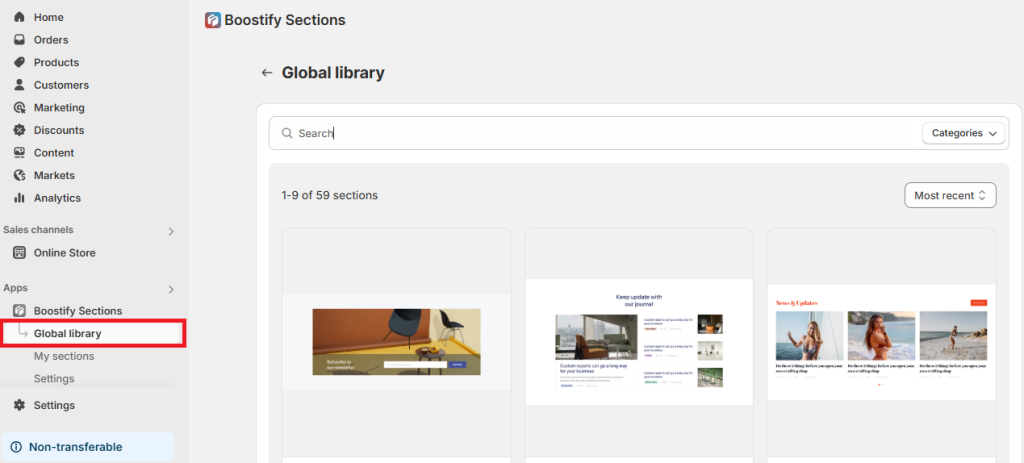
Then, you’ll be navigated to “Global Library” where you can see a variety of free sections, including Product, Testimonial, Blog, Slideshow, Newsletter, Feature Box, Image collage, FAQs, Banner, Countdown, Team member, About, and Scrolling text.
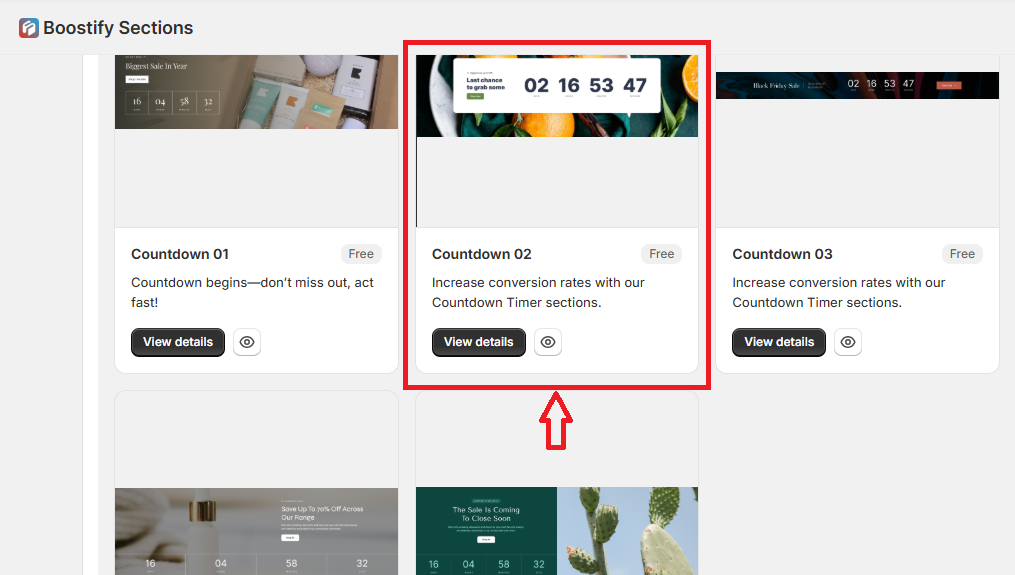
Select “Countdown” to explore free countdown timer templates.
Then, click “View details” or the eye icon to use your favorite template.
Click “Install to your theme” to use this countdown template in your current theme.
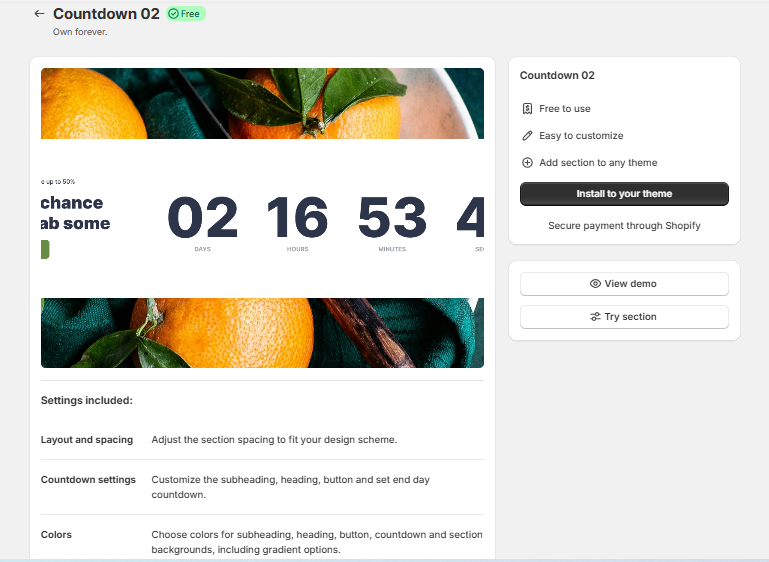
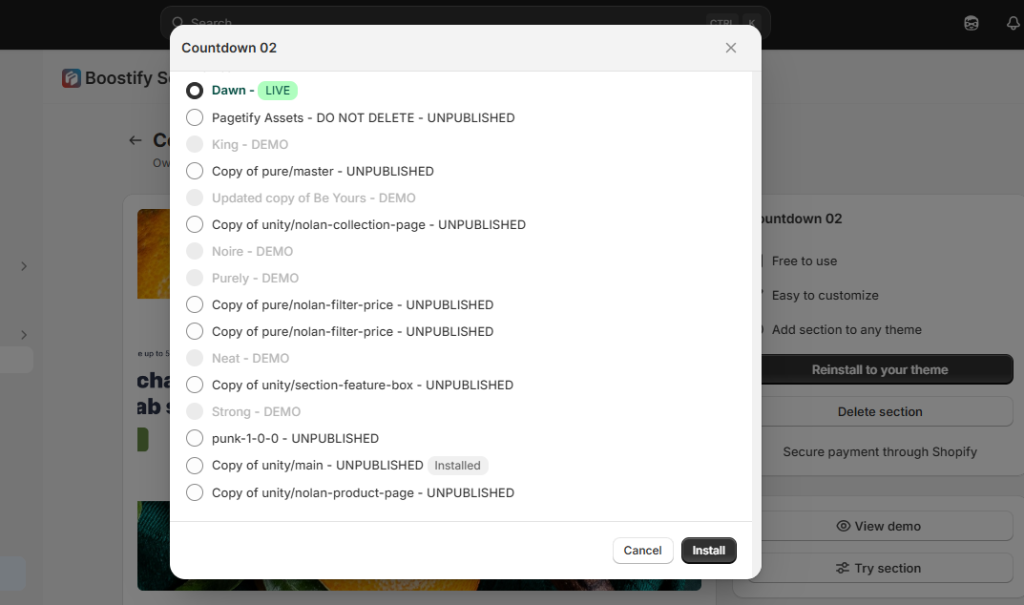
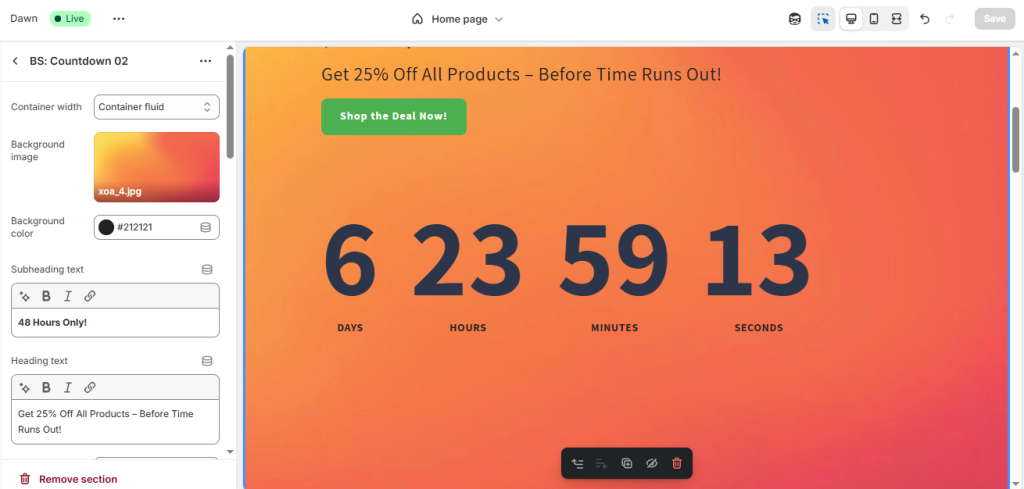
A pop-up will display as shown in the image below. Click “Install” to install “Countdown 02” to your theme.
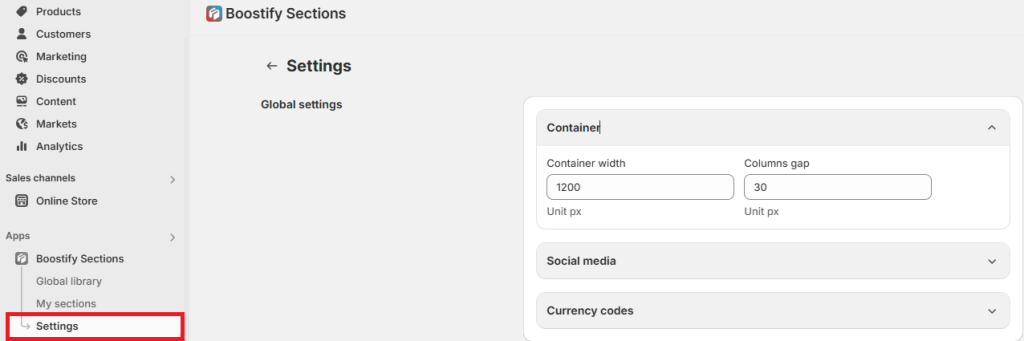
Come back to the Boostify Sections tabs, visit the “Settings” tab, and edit the Container width and Columns gap.
- Step 4: Customize the countdown
Next, let’s customize your theme.
In the Customizer, you select “Add section” and select “BS: Countdown 02”.
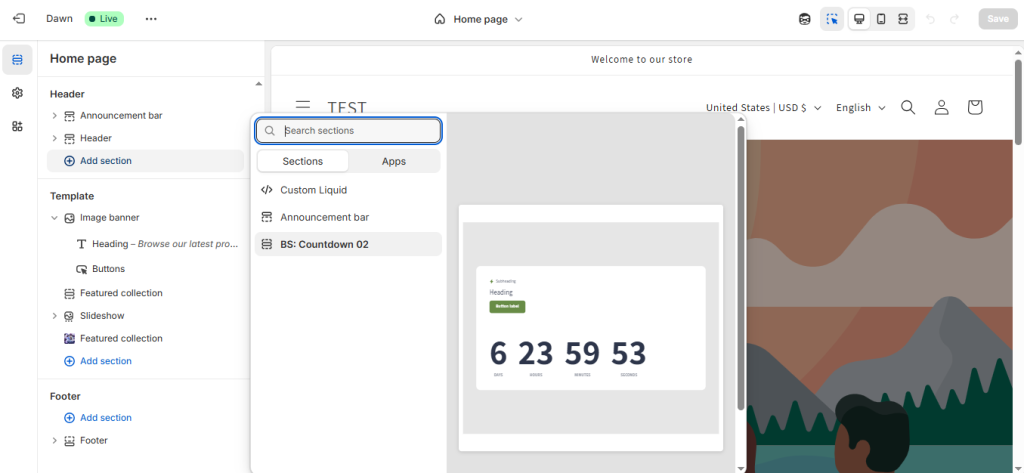
With this template, you can customize your background image, subheading, heading, button, font, color, and padding.

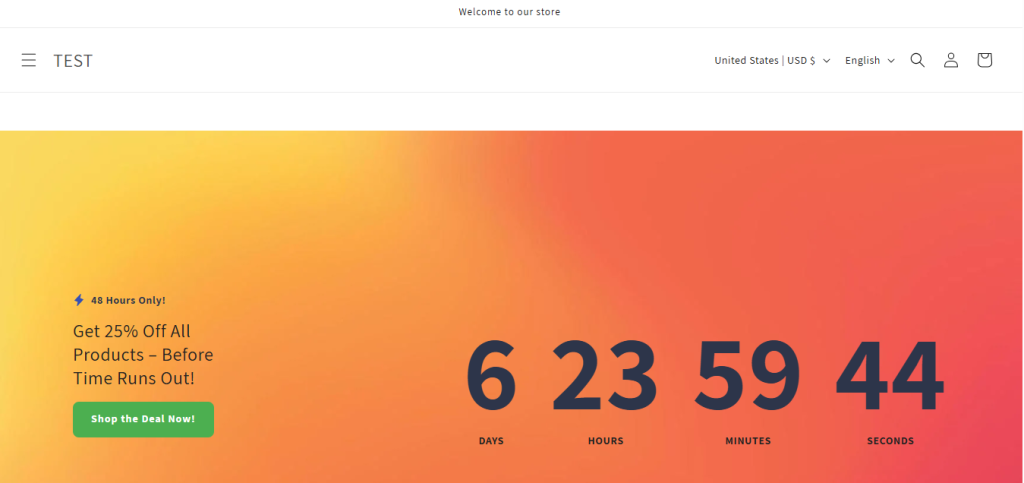
You can see the example below. You can easily change any elements on the available template to have your favorite countdown timer.
- Step 5: Save and publish
That’s it! The countdown timer will now appear on your live store.
Real Examples of Countdown Timers in Action
Here are 10 real or inspired examples of countdown timers used in Shopify stores, showing different styles, placements, and purposes to help you decide what fits your store best:
Gymshark – Blackout Countdown Timer
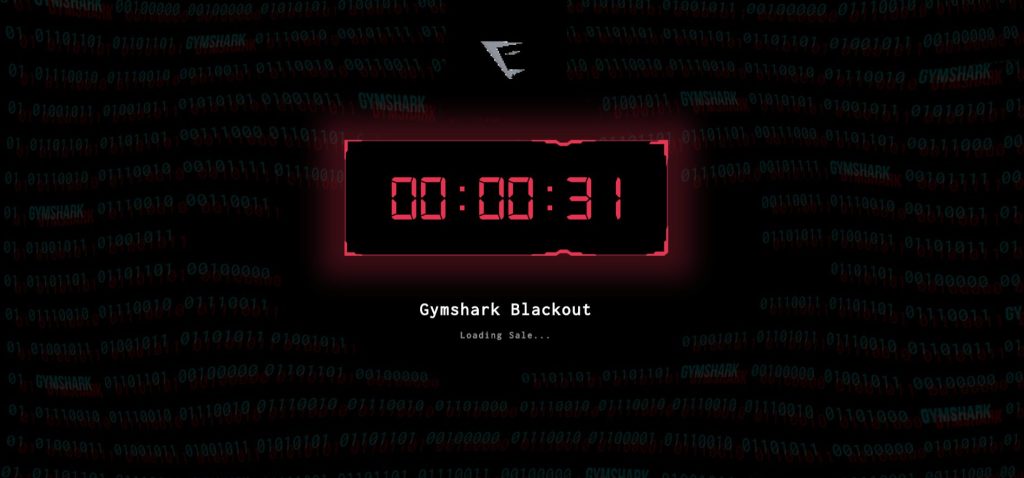
- Timer Type: Sale countdown
- Placement: Fullscreen pre-launch banner
- Purpose: Build hype and anticipation before the Blackout Sale
- Style: Digital red countdown on a black background with glowing red border. Text below reads “Gymshark Blackout” and “Loading Sale…”. The design creates a high-tech, urgent feel that grabs attention instantly.
Wildcoat – Homepage Price Increase Timer
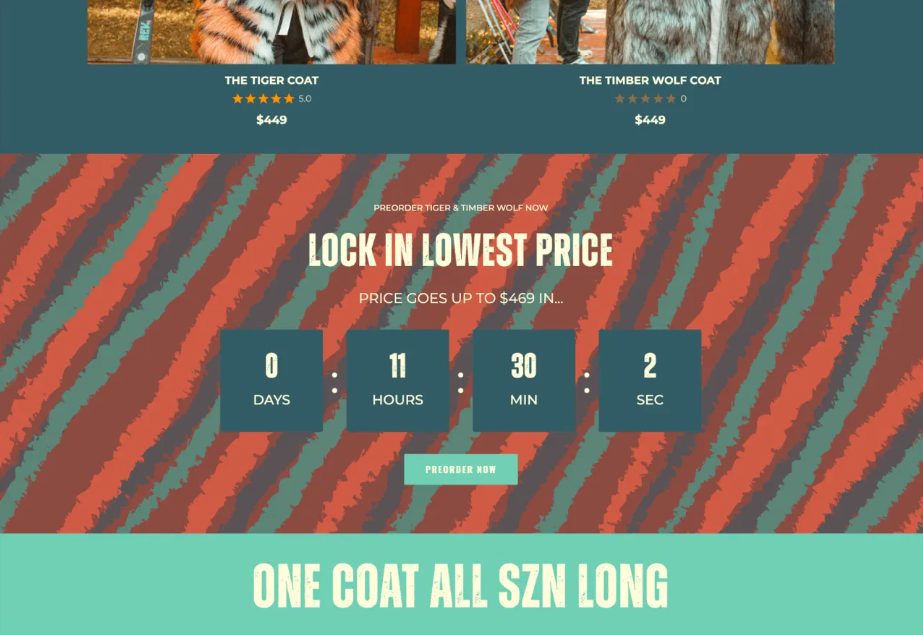
- Timer Type: Sale countdown
- Placement: Homepage banner
- Purpose: Alert users before a price increase
- Style: Blends with brand palette, bold overlay on hero image
PositiviTees – First‑Purchase Discount Timer
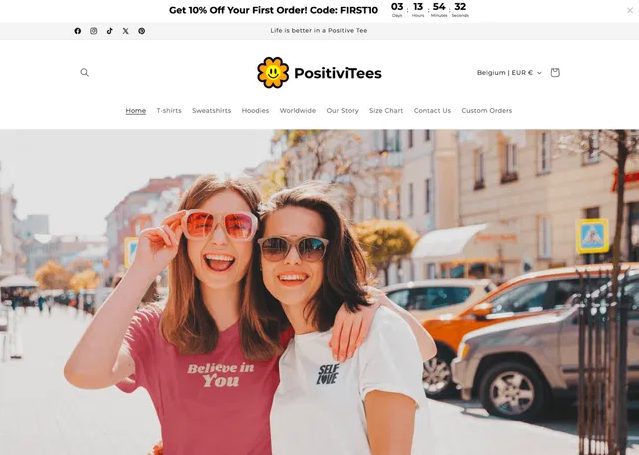
- Timer Type: Sitewide countdown
- Placement: Announcement bar across site
- Purpose: Encourage first-time buyers with promo code
- Style: Simple style matching brand font; code displayed next to timer
Desolve – Coming-soon Page Countdown

- Timer Type: Coming-soon launch
- Placement: Homepage
- Purpose: Build anticipation and collect email signups before launch
- Style: Large digital timer with clear “Coming Soon” messaging.
Tourister – Cart Page Giveaway Timer
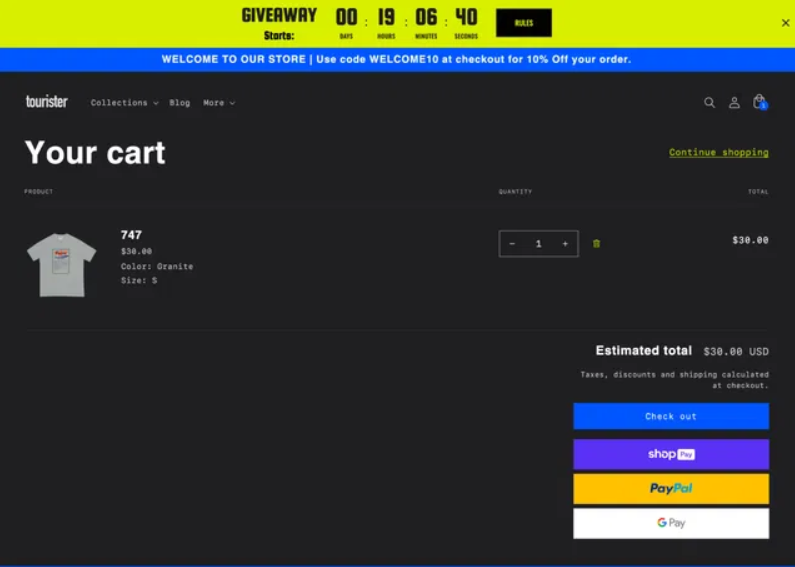
- Timer Type: Giveaway/event countdown
- Placement: Sticky bar on cart or checkout
- Purpose: Boost awareness of the limited-time giveaway
- Style: Neon colors for strong contrast and visibility
7 Tips to Make the Most of Your Countdown Timer
1. Place It Where Shoppers Look First
The location of your countdown timer plays a big role in its effectiveness. For maximum visibility, add it to high-attention areas like the homepage banner, top announcement bar, product pages (especially near the Add to Cart button), or even the cart page. These are key points in the customer journey where urgency can influence purchasing decisions.
2. Link It to a Real Offer
Shoppers are quick to spot fake urgency. Make sure your countdown timer is tied to a real promotion—like a flash sale, limited-time offer, or free shipping deadline. When customers know the timer reflects an actual expiration, they’re more likely to take action rather than hesitate.
3. Explain What the Countdown Is For
Don’t just show numbers ticking down. Tell your visitors what they’ll miss if they wait too long. For example: “Only 2 hours left to get 20% off sitewide” or “Sale ends tonight!” This adds context, makes the urgency clear, and motivates action.
4. Make Sure It Looks Great on Mobile
A huge portion of Shopify traffic comes from mobile devices, so your timer needs to look good on small screens too. Choose or build a countdown that’s responsive, scaling smoothly across desktop, tablet, and mobile. A distorted or hidden timer on mobile can mean lost sales.
5. Keep It on Brand
Your countdown timer should feel like part of your site, not something that looks out of place. Customize the fonts, colors, and layout to match your store’s branding. A clean, consistent look builds trust and makes your promotions feel more professional.
6. Combine It with Scarcity
Want to really push conversions? Combine your countdown timer with a low-stock message. For example: “Only 3 left – sale ends in 25 minutes!” This taps into both urgency and scarcity, two powerful psychological triggers that can help close sales faster.
7. Update or Remove It After Time Runs Out
Nothing’s worse than a countdown timer stuck at zero or still showing after the deal is over. Set your timer to either disappear or switch to a message like “Offer expired” once time is up. This keeps your site clean and avoids confusing customers who may think the deal is still active.
Final Thoughts
Adding a free Shopify countdown timer to your store is a simple but powerful way to boost urgency, drive conversions, and make your promotions more effective. Whether you use a free app like Boostify Sections or custom code, there are plenty of flexible, no-cost options to get started.
From flash sales to product launches, countdown timers can fit seamlessly into your marketing strategy—and as the examples show, even top Shopify brands use them to great effect. Just remember to keep your timer real, relevant, and on-brand for the best results.