One effective way to differentiate your Shopify store and leave a lasting impression on visitors is by incorporating custom fonts into your theme. While Shopify offers a range of default font options, adding a custom font allows you to infuse your brand’s personality and style into every aspect of your online presence.
In this article, we’ll explore step-by-step instructions on how to add custom font to Shopify theme, empowering you to enhance your brand’s visual identity and stand out in the digital marketplace.
Table of Contents
What font does Shopify use?
Fonts aren’t just about letters on a screen; they’re the voice of your brand in the digital world. Imagine strolling through a virtual marketplace where each storefront speaks to you in its own unique tone. That’s the magic of choosing the right font for your Shopify store. We’ve handpicked the best fonts for your Shopify store—ones that not only look great but also enhance your brand’s identity and make browsing a breeze.
Inter
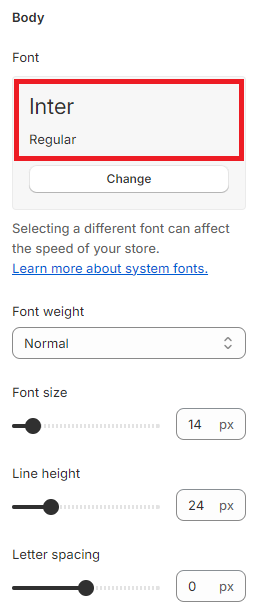
Inter is a modern, highly legible typeface designed specifically for digital screens. It features open apertures and generous spacing, making it exceptionally readable even on smaller devices.
Let’s see the Inter font on the frontend.

Helvetica

Helvetica is a clean, modern sans-serif typeface that offers excellent readability, making it ideal for headings, titles, banners, buttons, and other prominent text elements on the Shopify platform.
Let’s see how the heading of Helvetica font displays on the frontend.

Assistant

Assistant is a friendly and approachable typeface designed for enhanced readability across different mediums. Its rounded letterforms and generous x-height contribute to a warm and inviting appearance.

If you want to discover or try other fonts in your Shopify store, you can take a look at the Shopify fonts available.
How to Change the Fonts in Shopify Theme
In this tutorial, we are going to demonstrate how to change fonts in Shopify Neat theme. It is a clean, minimalist theme designed for Shopify stores. It offers a streamlined and elegant design, focusing on simplicity and usability to showcase products effectively.
Typography in the Neat theme emphasizes readability and visual hierarchy, aligning with the theme’s minimalist aesthetic. It typically features:
- Clear heading fonts: Neat employs bold and modern heading fonts to grab attention and guide users through different sections of the website.
- Readable body text: The theme utilizes legible and neutral body text fonts, ensuring that product descriptions and other content are easy to read and understand.
- Consistent typography: Neat maintains consistency in typography across various elements, including headers, navigation menus, and product listings, to provide a cohesive and polished appearance.
Now follow the steps below to change the font in the Shopify Neat theme.
- Step 1: Go to Shopify dashboard > Online Store > Themes > Customize
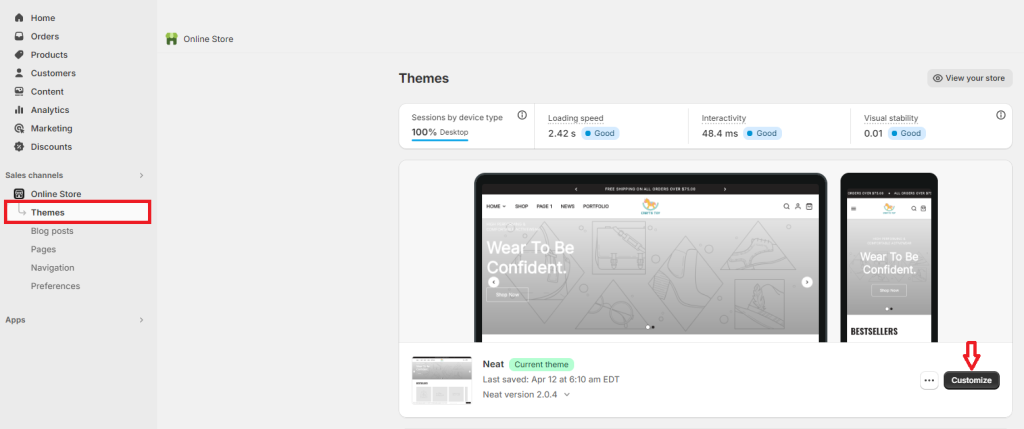
- Step 2: From the left-hand menu, click on the Theme settings icon, then select Typography.
In this section, you can:
Change body font and customize the font weight, font size, line height & letter spacing.

Change heading font and customize font weight, all headings’ font size, line height & letter spacing.

Change the font for navigation and buttons.
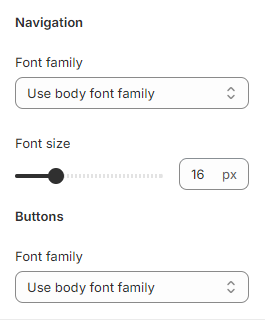
After changing the fonts, you click on the Save button on the top right of the screen to update the fonts for the entire store.
How to Add Custom Font to Shopify Theme
Adding a custom font to a Shopify store can enhance brand identity and differentiation. By using a unique font, you can create a more memorable and distinctive visual presence that aligns with their brand personality. Custom fonts allow for greater creativity and flexibility in design, enabling you to convey your brand identity more effectively and outstanding in a crowded marketplace. Additionally, a custom font can help you establish a consistent brand experience across all devices and touchpoints. That can foster trust and recognition among customers.
To add custom font to Neat theme, you need to use a Shopify app. There are a lot of Shopify apps out there that can help you with this process. But in this tutorial, we will use the Fontify app. Now, let’s get started!
Step 1: Find the font that fits your brand
The Google Fonts site is an ideal place for you to select your favorite fonts. All the fonts here are categorized according to various criteria such as language, technology, decorative stroke, classification, and properties.
In case you cannot find any font that matches your brand identity, you can design your own font and upload your font file to your Shopify store.
Whether you select fonts from Google Fonts or create custom fonts on your own, you’ll need a Shopify font app to add them to Shopify.
Now, come to the next step to see how to install and use the app.
Step 2: Install the font app
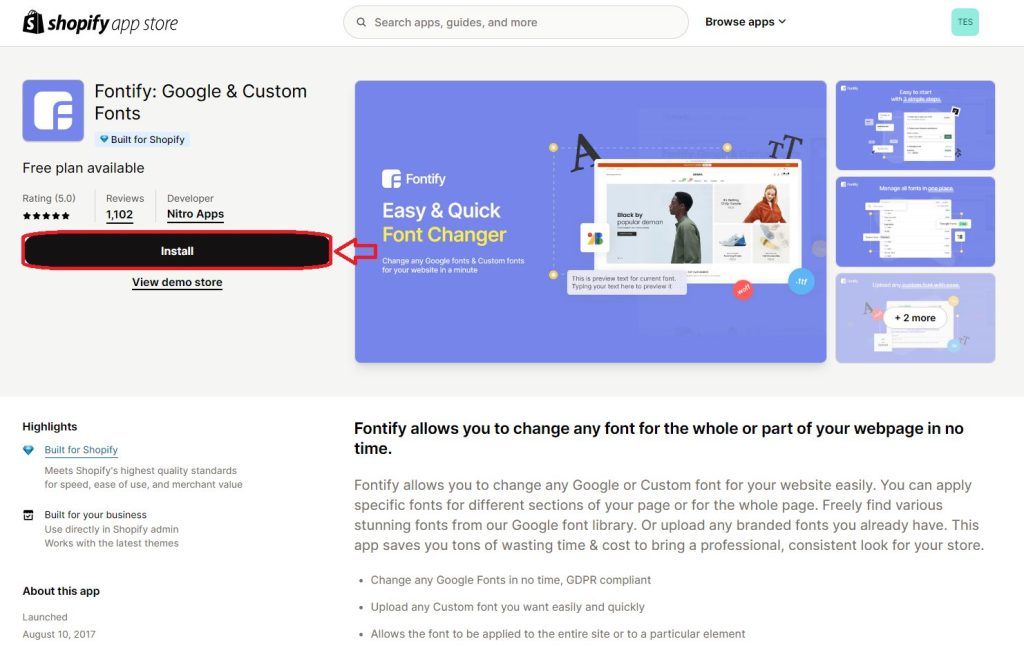
Go to Shopify App Store, find the Fontify app, and then click Install.
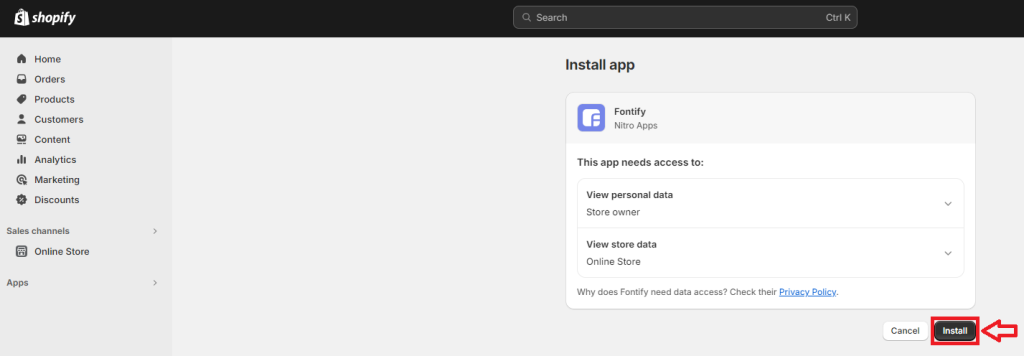
Continue to click the Install button to install the app for your current Shopify store.
Step 3: Integrate the font app with the theme
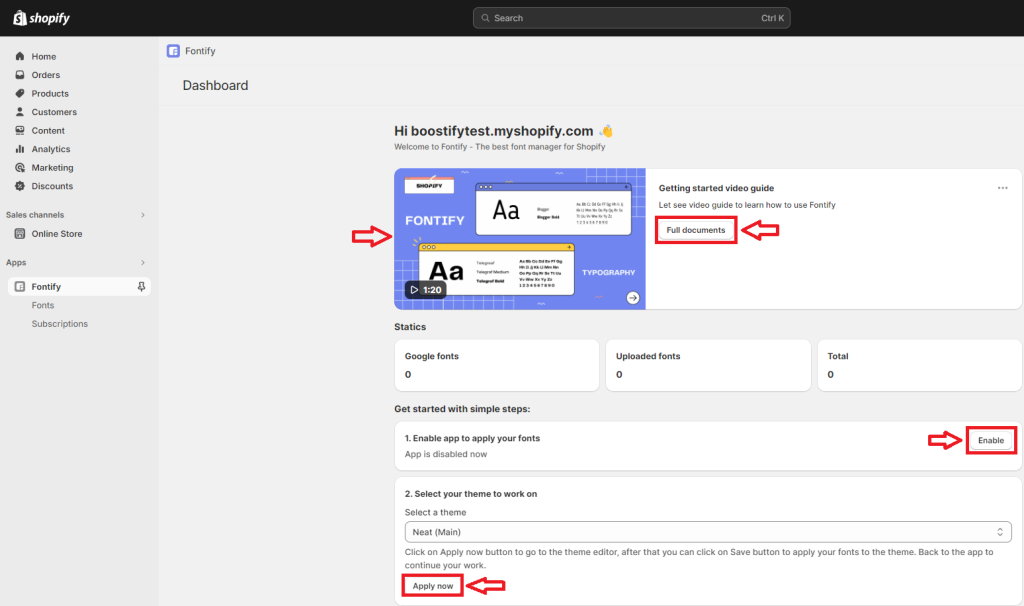
You’ll access the dashboard where Fontify shows you the guide on how to use the app with a video and documents.
Then, just follow the three steps below the line: Get started with simple steps.
First, click Enable to activate the app.
Next, you select a theme to work on and tap on Apply now to go to the theme editor.
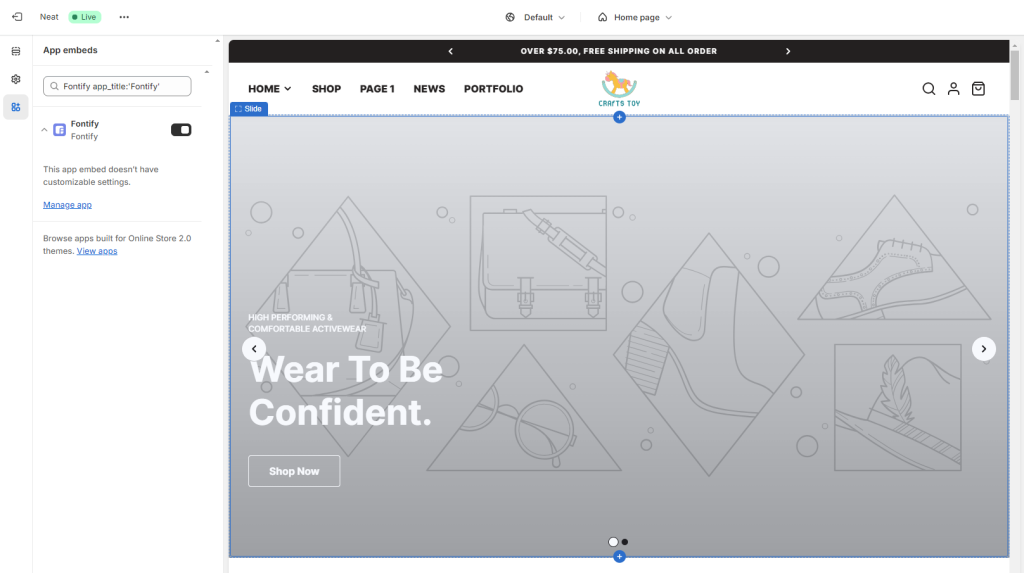
This is the Neat theme editor, and Fontify app is already integrated into the theme.
Step 4: Add custom fonts to Shopify theme
Come back to the Shopify admin dashboard continue with step 3 – Add fonts.
Click on Add new font or Create a new font.
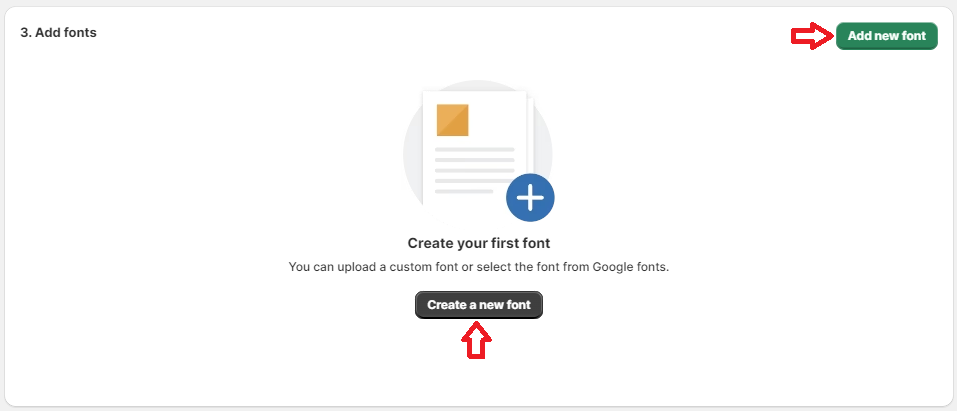
Add Google fonts to Shopify (free)
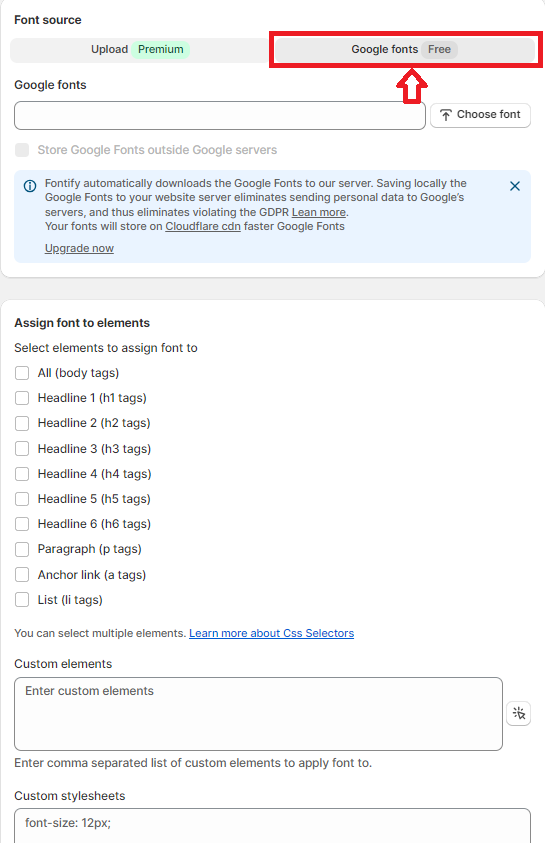
The Fontify app allows adding Google Fonts for free. You simply select the Google fonts tab.
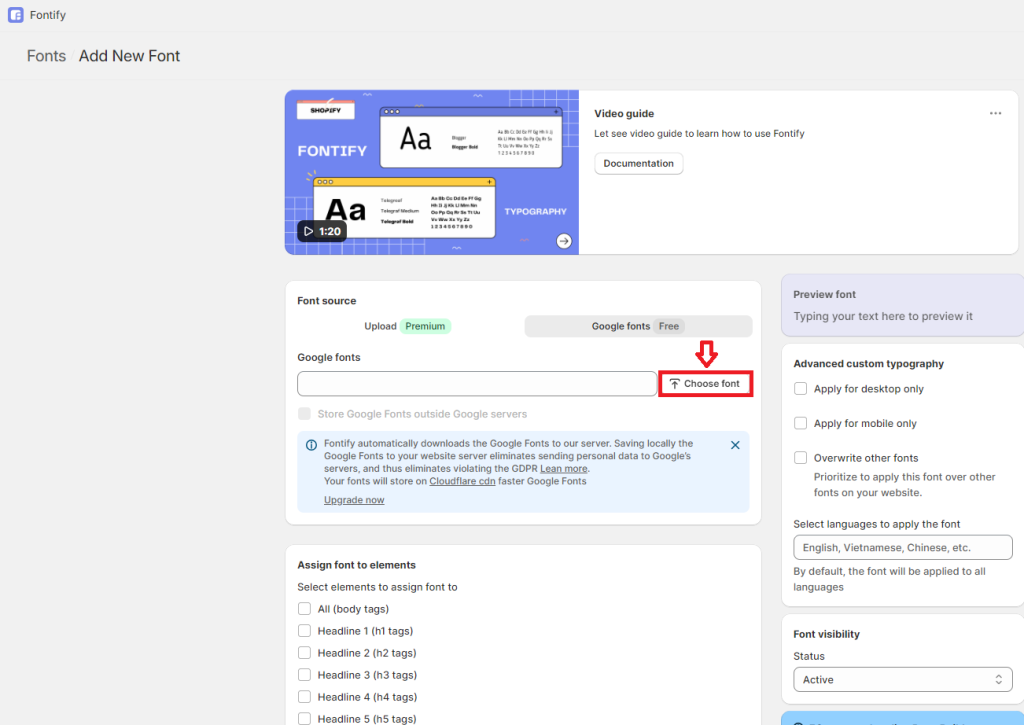
Then, Choose font to get your favorite font from Google Fonts.
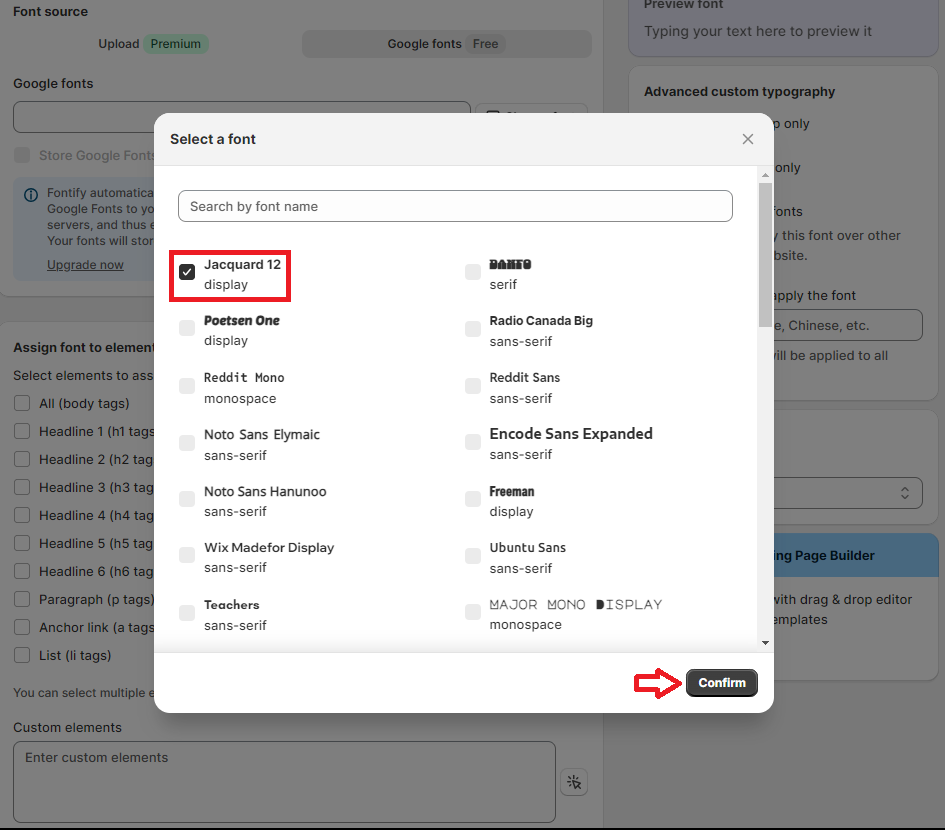
A list of Google fonts will be displayed on the screen. Select one and Confirm.
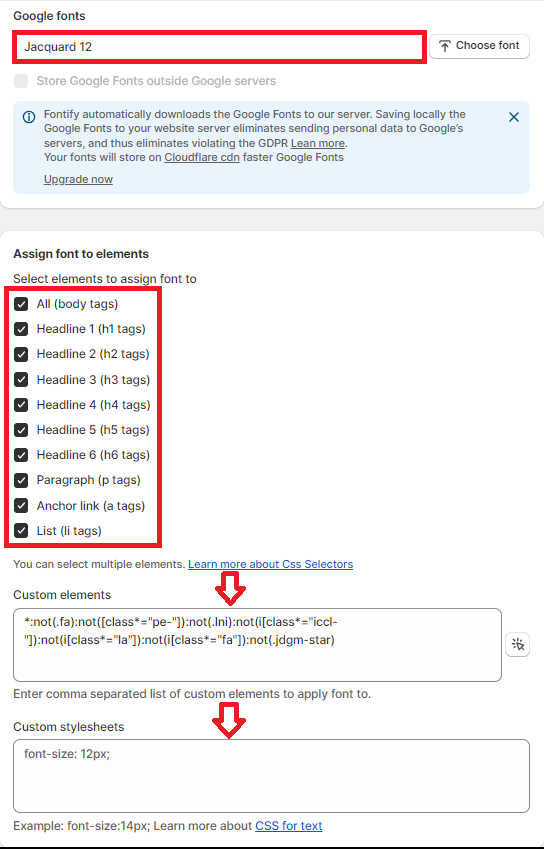
After the font is selected, continue assigning the font to body tags such as headings, paragraphs, anchor links, and lists. In addition, you can add custom elements and stylesheets for the font.
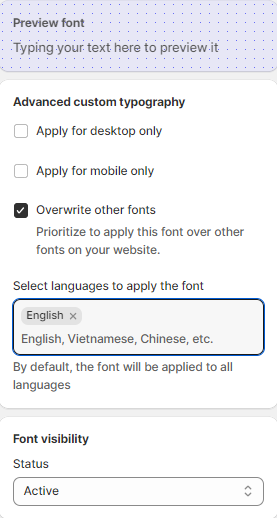
Looking to the right, you’ll find other options for typography, language, and visibility.
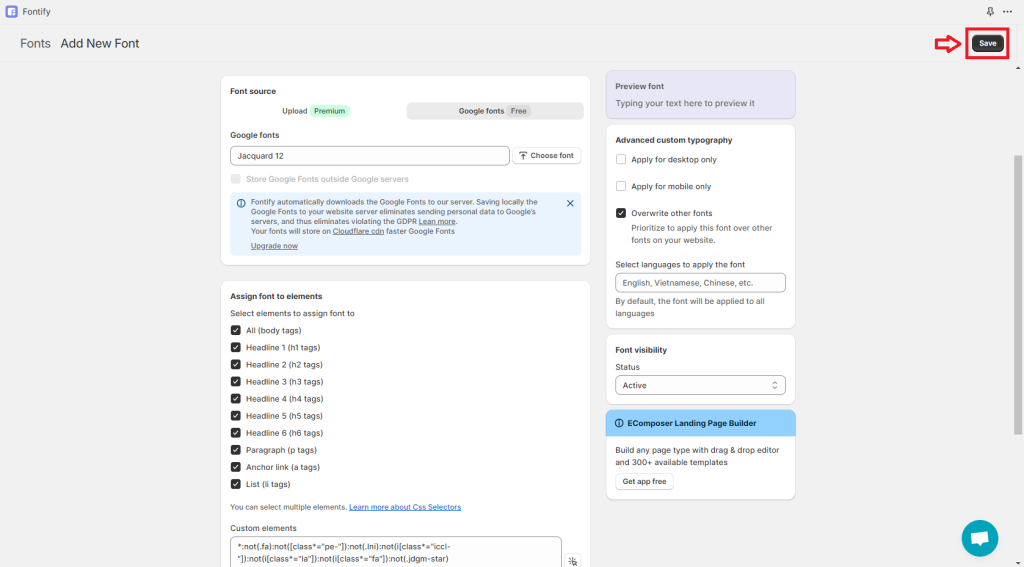
After selecting the elements to apply the font, you click on the Save button at the top right corner to use this font for the entire store.
That’s all about adding Google fonts to your Shopify theme. Let’s see how the font is displayed on the frontend.

Upload your own font file (premium)
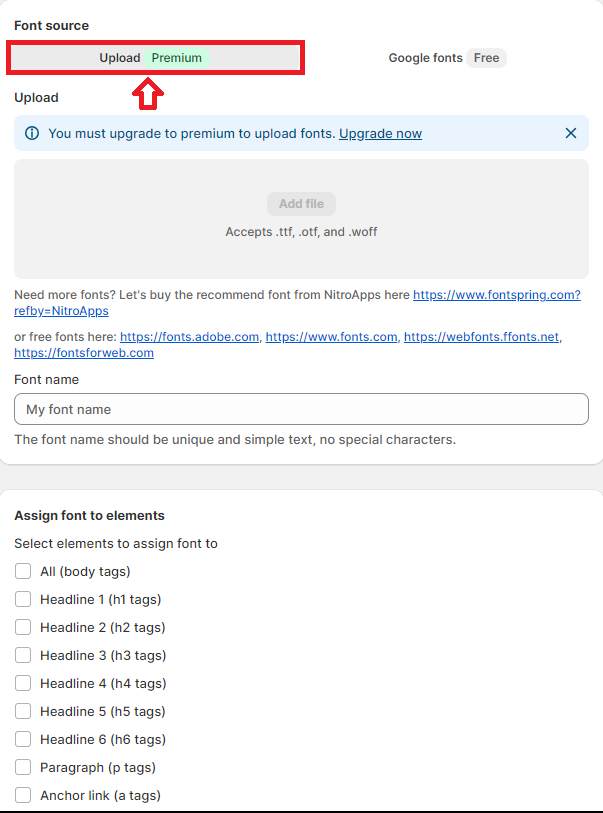
Come back to the main dashboard for the Fontify app and you’ll see the Upload tab. While the app allows you to upload Google fonts for free, it requires upgrading to the Premium plan to upload your custom font file.
For a stunning store design, you can refer to the best Shopify fonts.
For a final word,
Fonts aren’t just decorative elements on a Shopify store – they’re integral to its identity and user experience. They affect everything from readability to branding, aesthetics to accessibility. Choosing the right fonts can set you apart in a crowded and competitive online market and leave a long-lasting impression on customers. Whether you’re using fonts from Shopify’s library or customizing your own, they help build a cohesive brand presence, improve readability, and showcase your brand’s personality.
Apart from the fonts offered by Shopify, you can add custom fonts to your Shopify store. In this article, we have shown you all the steps on how to change and add Shopify fonts. Hope that it will help you in building your brand and attracting customers.
Refer to other how-to guides on our website:

