WP All Export is a powerful plugin that allows you to export your WooCommerce data in a variety of formats. You can use it to upload your products to the Google Merchant Center to support online advertising campaigns or to automatically integrate your data with 1000+ apps using Zapier. Instead of editing your products one by one through WooCommerce, you can export them to a spreadsheet, bulk edit them, and then re-import them with just a couple of clicks, saving you valuable time. You can even migrate your entire store to another site.
In this article, we’ll walk you through some of these tasks. To follow along, use this convenient sandbox feature and select WooCommerce Store as the demo type.
Table of Contents
A Simple WooCommerce Customer Export
Imagine that you want to generate a list of Californian customers for a marketing campaign. Every export from WP All Export follows a similar process:
Step 1 – Choose the type of data that you want to export:
- Click All Export > New Export in the WordPress navigation menu.
- In the New Export screen, choose WooCommerce Customers as the post type:
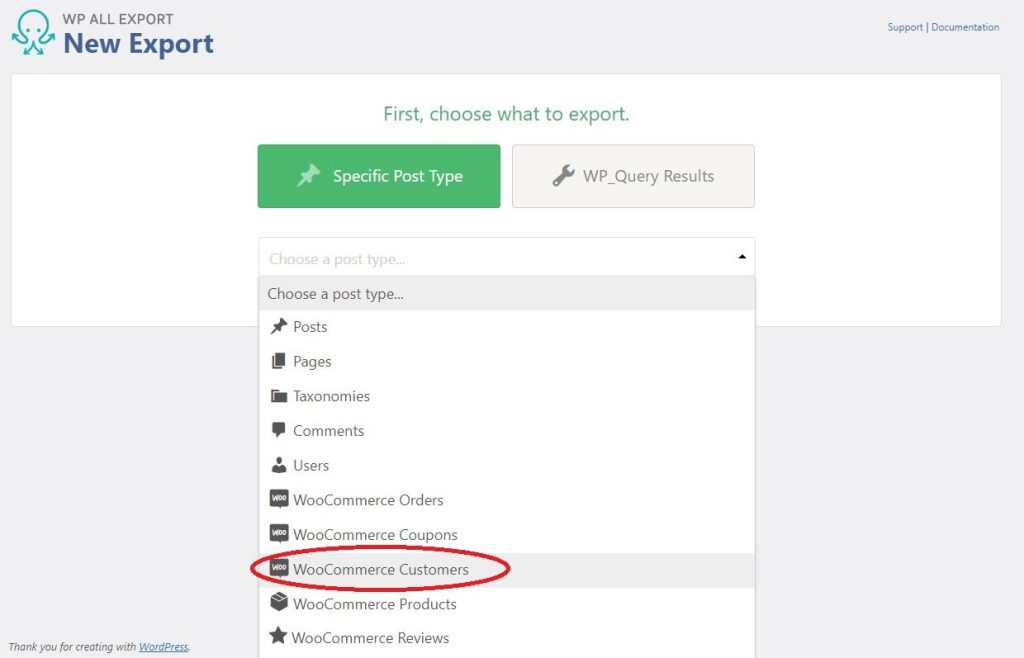
You can choose any type of WordPress or WooCommerce data from this selection list, including data from third-party add-ons or plugins.
Step 2 – Apply filters (optional)
- As soon you select a post type, an Add Filtering Options panel will appear near the bottom of the screen. Specify this simple filter:
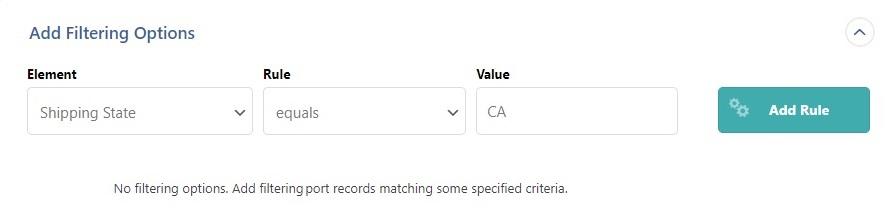
- Click the Add Rule button. When you do this, WP All Export will apply your filter to the customers that will be exported. In our test data set, there are 8 customers from California.
Step 3 – Select the export columns
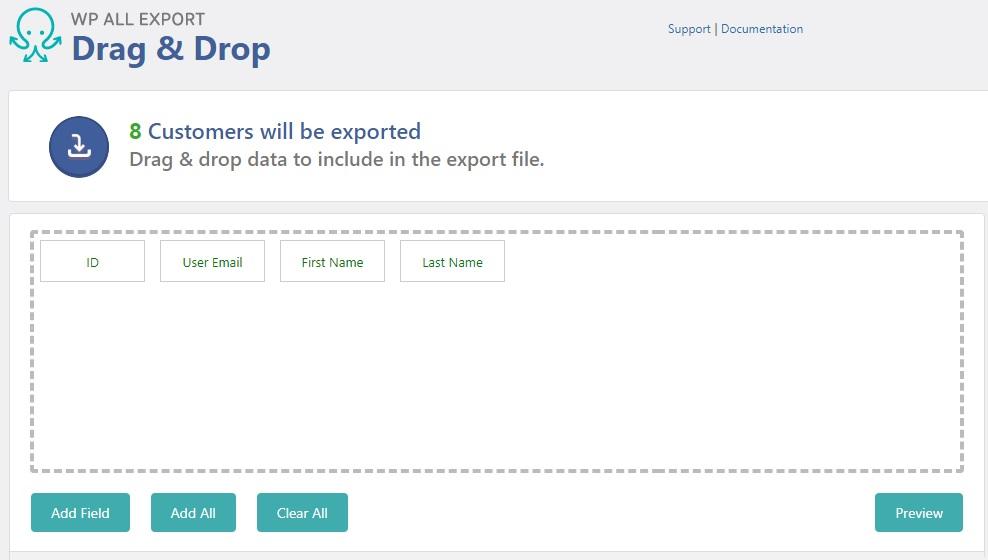
- Click the Customize Export File button. This will bring you to the Drag & Drop screen. On the right-hand side of this screen, you will find an Available Data panel showing a list of data sources. Expand the Standard data source and drag the First Name and Last Name fields into the column selection area.
- Remove the User Login field from the selection area by dragging it over to the Available Data panel. Your screen should now look like this:
Step 4 – Complete the export
- Click the blue Continue button at the bottom of the screen, which will bring you to the Export Settings screen
- Click the green Confirm & Run Export button on the right-hand side. This will bring you to the Confirm & Run screen.
- When the export is complete, click the blue CSV button in the Click to Download section in the lower half of the screen. This will download the export file.
- Open the downloaded file in your favorite spreadsheet. Here is what our sample data looks like in Microsoft Excel:
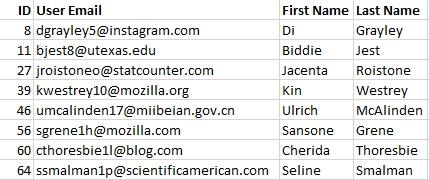
And that’s it — a simple list of customers from California!
One thing that we like about WP All Export is that every export, no matter how complex, follows this same basic process.
For more information on exporting customers, see Export WooCommerce Customers to XML & CSV.
Exporting WooCommerce Products to the Google Merchant Center
To export products, you begin the export the same way except that you choose WooCommerce Products as the post type instead of WooCommerce Customers.
You also use the same filtering process, though it can be as complex as you want:
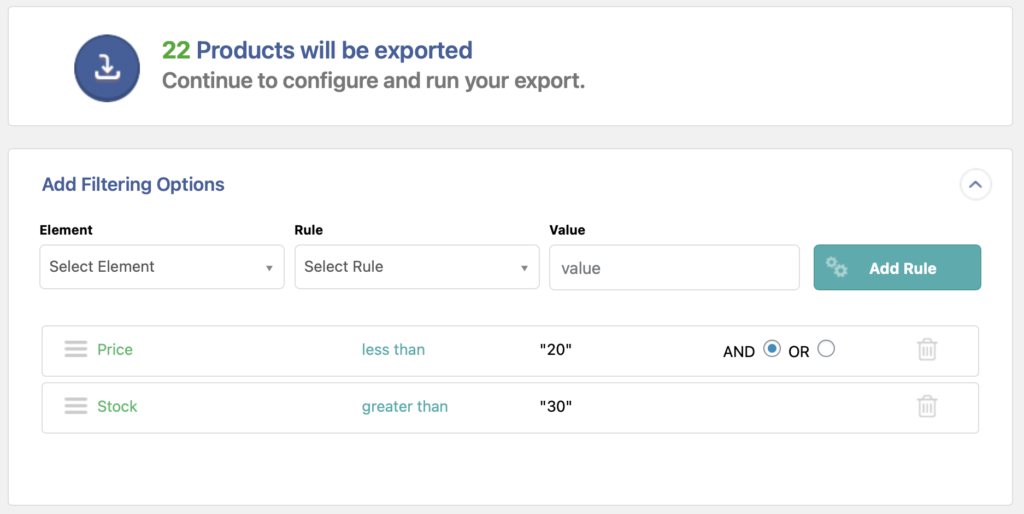
In this case, we’re asking for products that sell for less than $20 and have more than 30 units in stock.
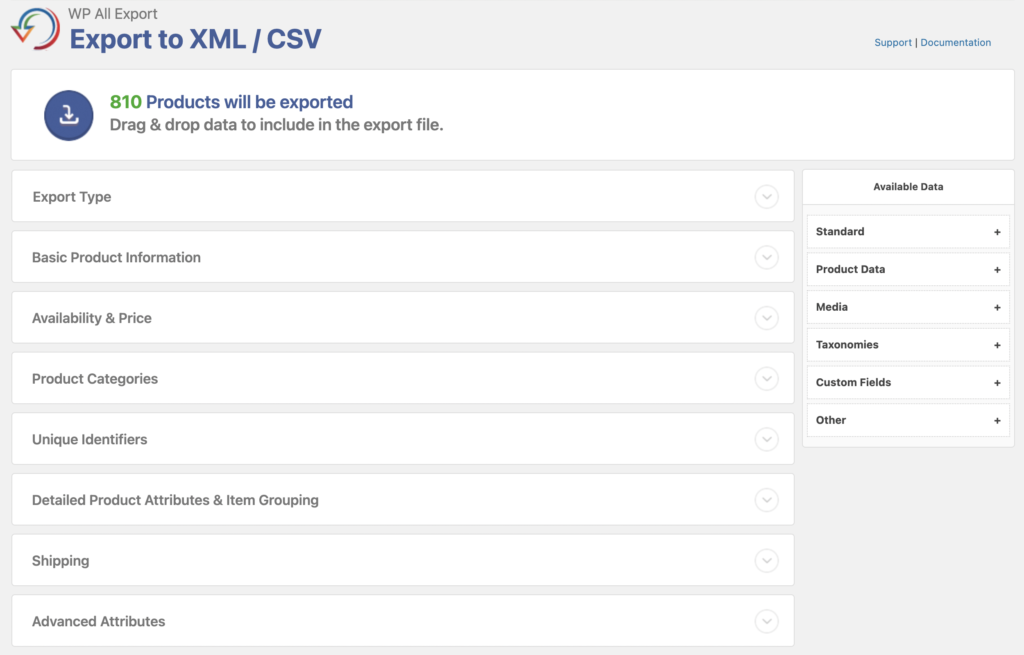
Click the Customize Export File button.
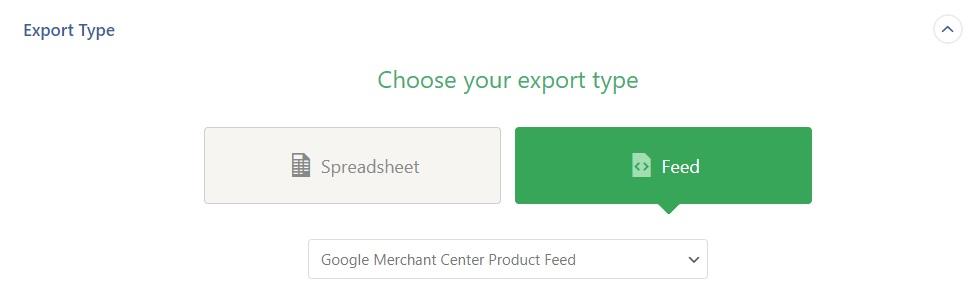
Normally, you would just start selecting columns. But let’s say that you want to export your products to the Google Merchant Center — a target with very specific requirements. To meet these requirements, all you need to do is expand the Export Type panel at the bottom of the Drag & Drop screen and choose Feed instead of Spreadsheet as the main export type, then choose Google Merchant Center Product Feed option as the subtype:
The moment you do this, WP All Export will create a number of additional panels to guide you through the Google Merchant Center options:
Here, for example, are the options for the Basic Product Information panel:
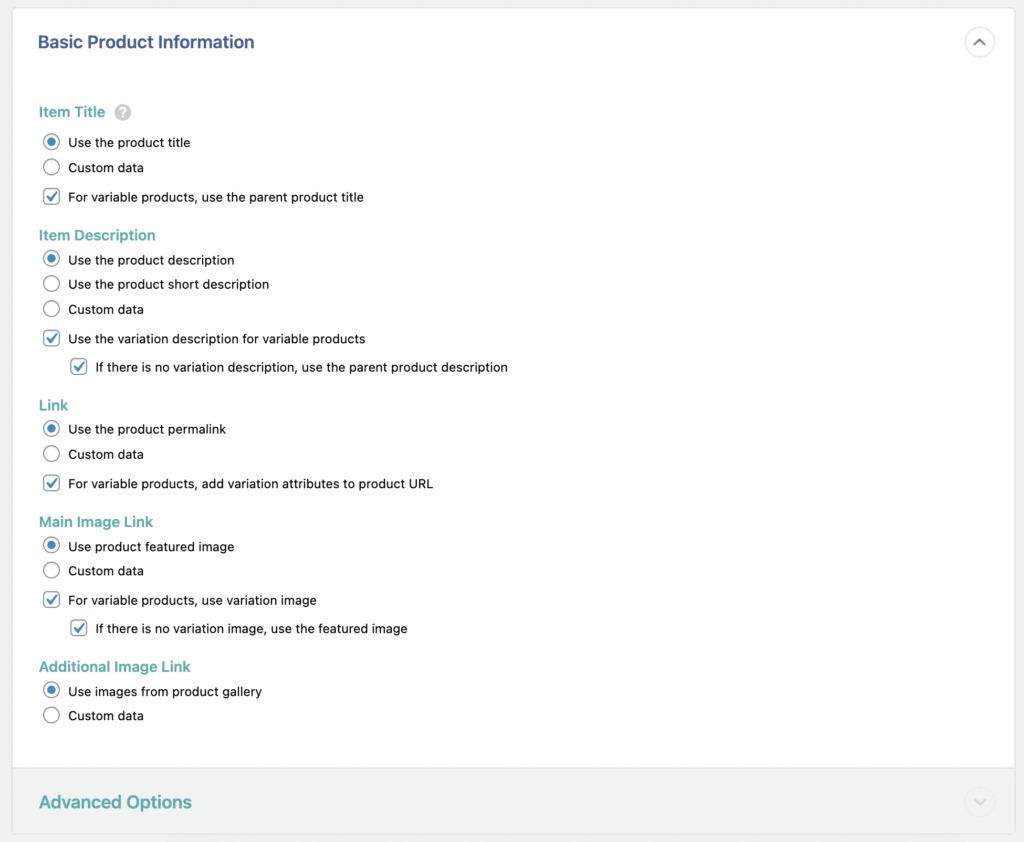
Look closely at some of the options in this panel, such as where to draw item descriptions, links, or images. How would you manage these issues without a wizard guiding you through the process?
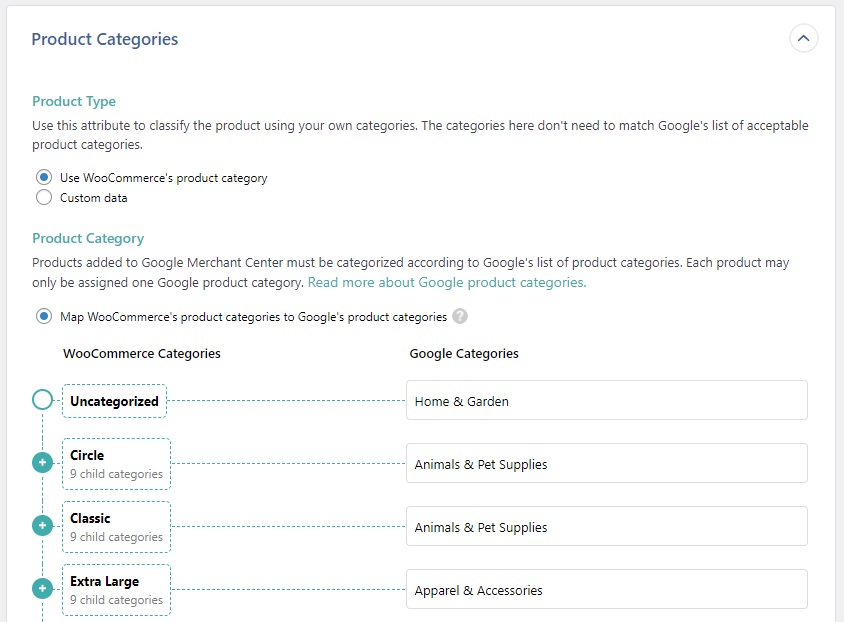
And look at this panel for Product Categories, which allows you to map your WooCommerce product categories to Google product categories. Again, how would you handle this if WP All Export didn’t set this up for you in advance?
The same is true for the rest of the Google Merchant Center panels.
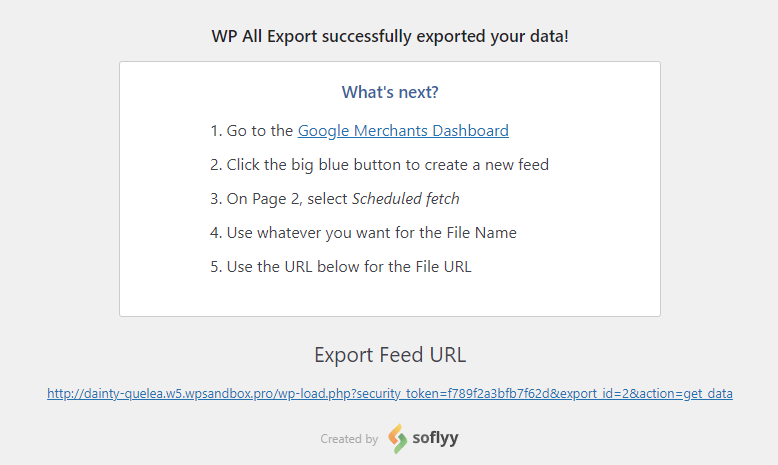
When you finish with these panels, hit the blue Continue button at the bottom of the screen. This brings you to the same Export Export Settings screen as before. But when you click the green Confirm & Run Export button, WP All Export intervenes again, this time to set up your export as a URL and provide you with the instructions that you need to successfully upload it to the Google Merchant Center:
This is how WP All Export turns a very complex process into a set of simple, sequential tasks.
Bulk Editing Products
You have just come up with a great idea for a sale featuring all products with a price greater than $20. To emphasize this fact, you’d like to temporarily change the title of the sale products to include the phrase “ON SALE” at the beginning. But your sale will affect many products and you don’t want to change them one by one.
Fortunately, WP All Export has a simple solution.
First, export all products with a Price > 20 and use the default column selection. At the end of this process, download your CSV file and open it in a spreadsheet.
In the spreadsheet, insert a new column beside the existing Title column and enter a formula in the new column that will add the prefix “ON SALE – “ to the existing Title contents. In Excel, you would use this formula:
=”ON SALE – “&B2
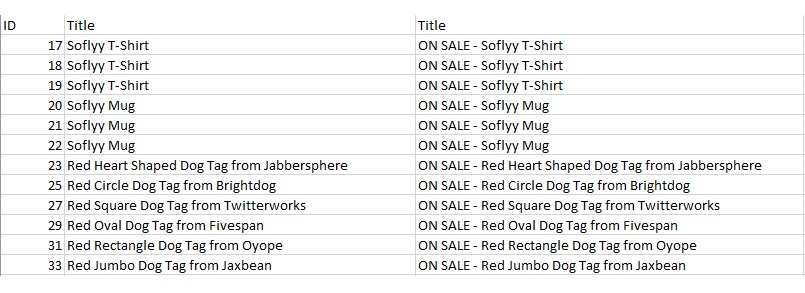
When this formula is applied, it will create a value like “ON SALE – Soflyy T-Shirt”.
Copy the formula to all the rows in your new column so that your spreadsheet looks something like this:
Next, copy all the values from your new column into the old Title column, but paste them as values to get rid of the formula. Then delete your new column and save the file.
Finally, import your modified product file by using the following steps:
- Click All Export > Manage Exports.
- You should see your product export at the top of the list in the Manage Exports screen.

- On the far right of your export row, under the Info & Options section, click Import with WP All Import. This will start the import process.
- In the New Import screen, click Upload a file and select your modified product file. After your file uploads, your screen should look like this:
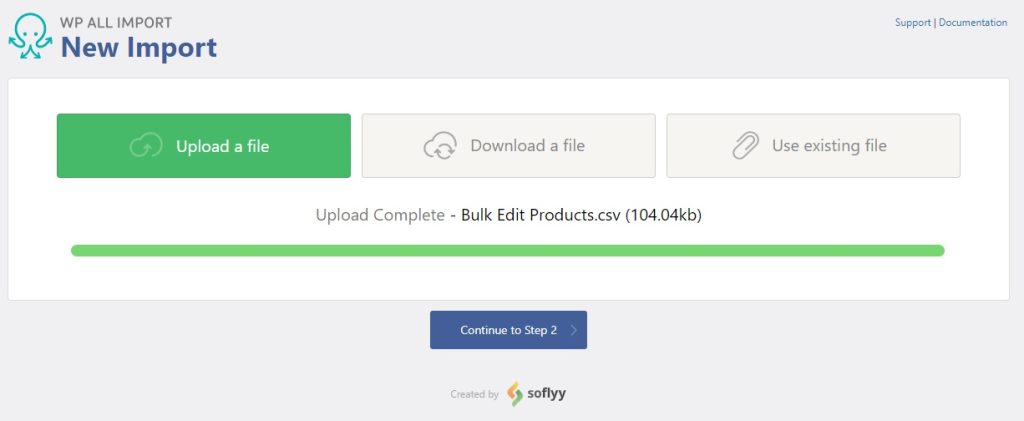
- Click the Continue to Step 2 button. In fact, keep hitting the Continue button for all subsequent screens until you come to the Confirm & Run screen, where you simply click the green Confirm & Run Import button.
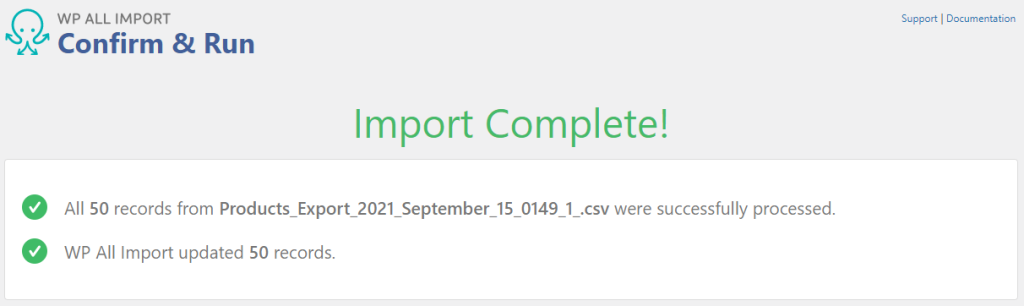
When the import is complete, you should get a confirmation like this:
If you now check the affected products in WooCommerce, you will find that they have all been updated with the “ON SALE – “ prefix:
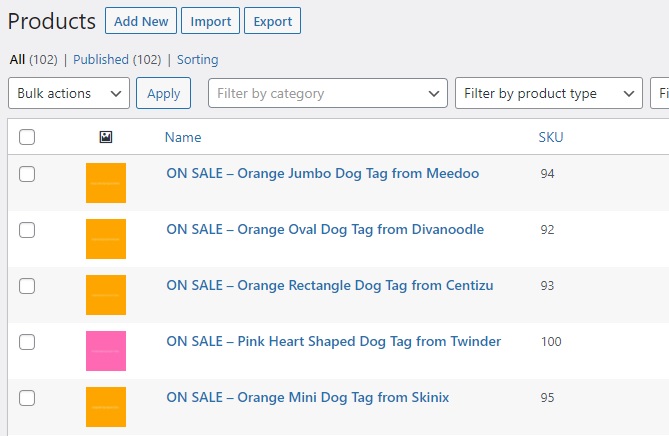
In other words, you just saved yourself a lot of time and work!
Wait a minute! you might say. How did WP All Import know to automatically handle all of those import screens where you clicked Continue?
Because WP All Export and WP All Import are designed to work together. As long as your import file has the required information, WP All Import knows what to do with it.
For more information on exporting products, see Easily Export WooCommerce Products to XML & CSV.
WooCommerce Order Exports
To export orders, you begin the export the same way as the previous exports except that you choose WooCommerce Orders as the post type.
With the exception of the section on the Google Merchant Center, which is product-specific, everything we’ve said about customers and products applies to orders, too. The biggest differences with order exports are:
- Order information is often required for external sales reports. If the target system has good data manipulation tools, you can usually export orders in CSV or Excel using the default processes. But if you’re responsible for the data manipulation, you may need to use some of WP ALL Export’s more advanced features such as WP_Query and PHP functions.
- Migrating data from one store to another can be trickier for order data than customer or product data because order data has dependencies on these other data elements. Again, WP All Export has features specifically designed to help with this.
We don’t have sufficient space in this article to describe all of these features, but let’s take a look at one of them.
Custom Fields Using PHP
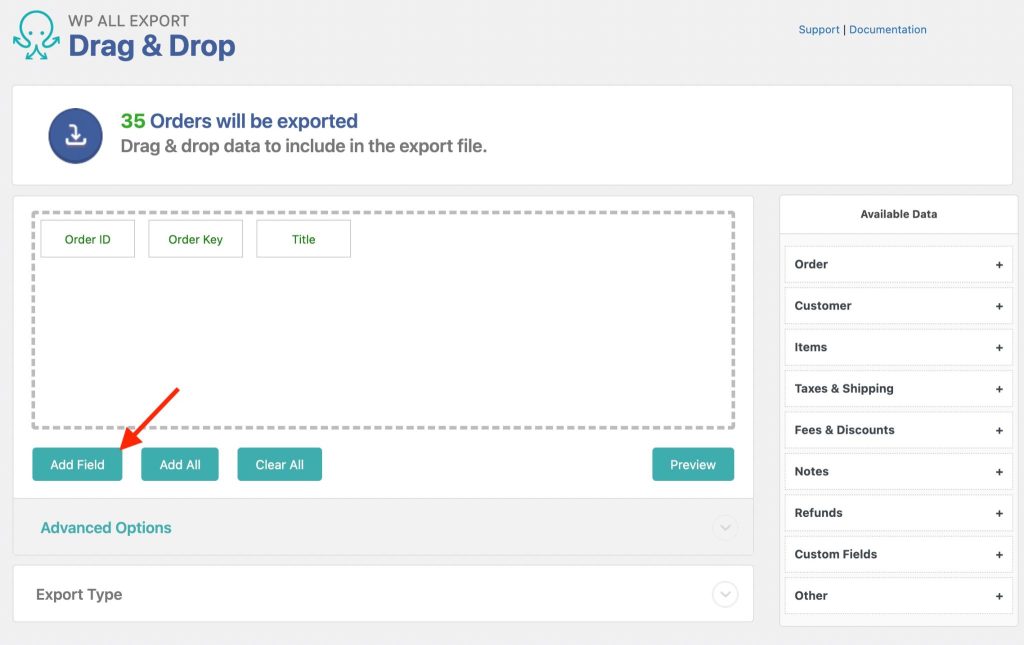
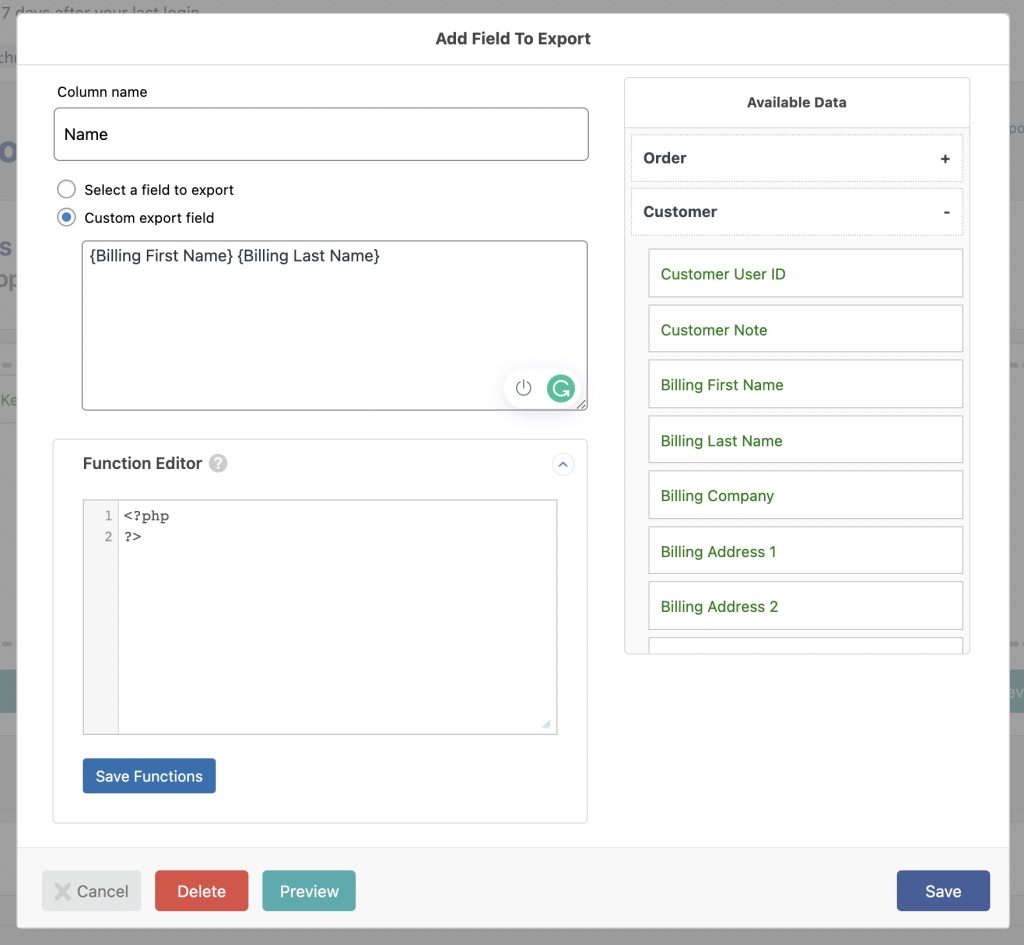
It is easy to create custom fields in WP All Export. For example, to merge a customer’s first and last billing names into one name field, you start by clicking the Add Field button in the Drag & Drop interface:
This opens the Add Field to Export form. You define your new export field using these steps:
- Select the Custom export field option.
- In the text box below this option, drag and drop the Billing First Name and Billing Last Name fields from Available Data › Customer. Put a space between them.
- In the Column name box at the top, enter Name.
Your form should look like this:
If you click the green Preview button on the bottom, you will see that the Name field does indeed combine the first and last billing names.
However, sometimes this kind of simple custom field is not enough.
Dismiss the preview (if open), then click the blue Save button on the bottom right.
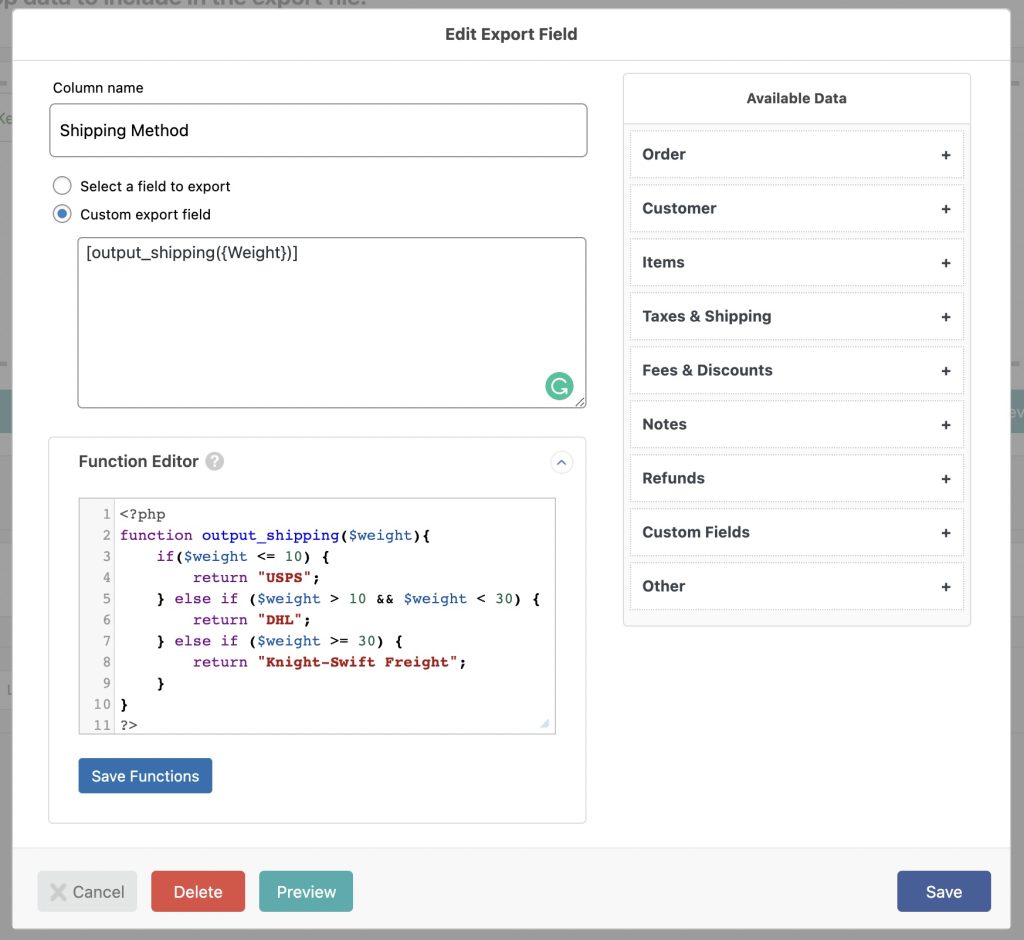
Let’s say that you want to add a shipping method to your orders based on their weight. If an order weighs less than 10lbs, it should be sent using ‘USPS‘. If it weighs between 10-30lbs, ‘DHL’ should be used. Finally, if the order is heavier than 30lbs, it should be sent via ‘Knight-Swift Freight’.
Here’s how to do this:
- Click the Add Field button to re-open the Add Field to Export form.
- Select the Custom export field option.
- In the text box below this option, enter “[output_shipping({Weight})]” without the quotes. This is a function call. Notice how the Weight field is surrounded by curly brackets.
- Enter the following PHP function in the Function Editor between the php tags:
function output_shipping($weight){
if($weight <= 10) {
return “USPS”;
} else if ($weight > 10 && $weight < 30) {
return “DHL”;
} else if ($weight >= 30) {
return “Knight-Swift Freight”;
}
}
- Click the Save Functions button.
- In the Column name box near the top of the form, enter “Shipping Method”.
Your form should now look like this:
Click the Save button to save the field. This will also close the form.
Back in the Drag & Drop interface, drag the Items > Advanced > Weight field from the Available Data panel into the column selection area, then click the Preview button:
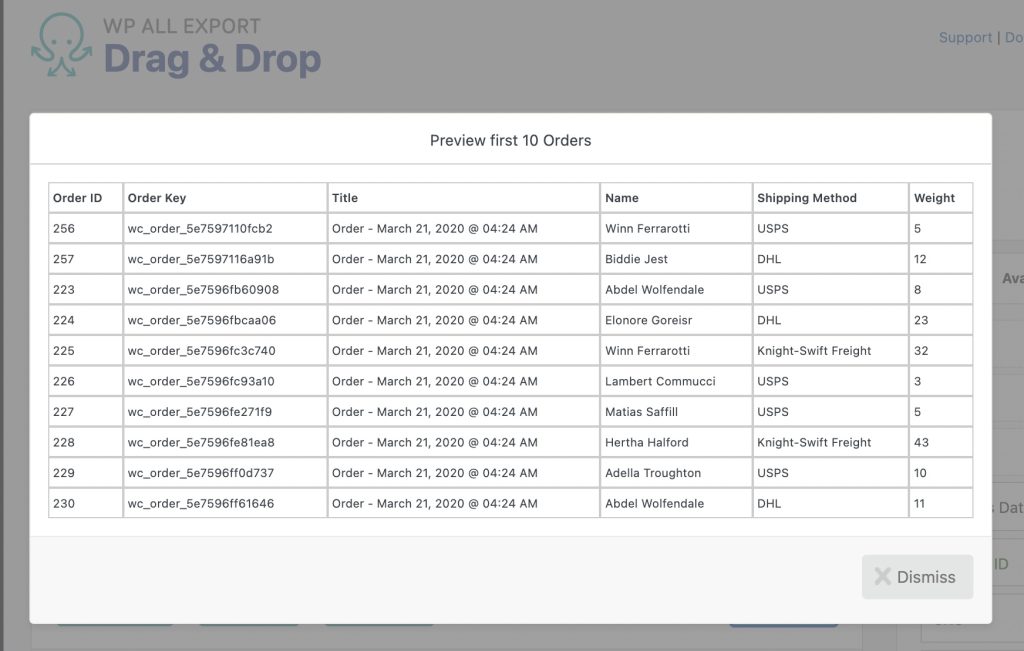
As you can see from the contents of the Shipping Method column, the output_shipping function appears to be working correctly.
For more information on exporting orders, see Export WooCommerce Orders to XML & CSV.
In conclusion,
WP All Export stands out as one of the best import export plugins for WooCommerce. With its user-friendly interface and comprehensive features, it provides a complete solution for efficiently exporting WooCommerce data to CSV, XML, and Excel formats. By seamlessly integrating with other systems and workflows, WP All Export becomes an invaluable tool for businesses seeking optimal data management. As one of the best WooCommerce plugins available, WP All Export empowers users to extract, manipulate, and integrate their WooCommerce data to streamline workflows and drive growth.