Smart Product Filter is a useful addon of Avimart. This WooCommerce product filter offers multiple features that make the searching products process faster and easier, resulting in a better shopping experience and more sales.
Key features of Smart Product Filter
- Filters by any criteria, attributes, taxonomies, prices, or other product data.
- Support 2 layouts vertical and horizontal layout
- Automatically adopts product data and shows only remaining filter term
- Work in default shop page and in custom shop pages using WooCommerce shortcodes
- Ajax loading, no need to refresh the page
- Optimized for mobile
With the powerful functions mentioned above, it is worthy to know how to use the Avimart product filter addon on your site. In this article, we will show you how to set up smart product filters on your site, how to display product filters horizontally, and how to include product filters in a new shop page with Elementor.
How to Set up Smart Product Filter with Elementor
Step 1: Enable Smart Filter
To use Smart Product Filter in your WooCommerce store, first, you need to enable it by going to Avimart -> Add-ons, then you see the list of features of Avimart.
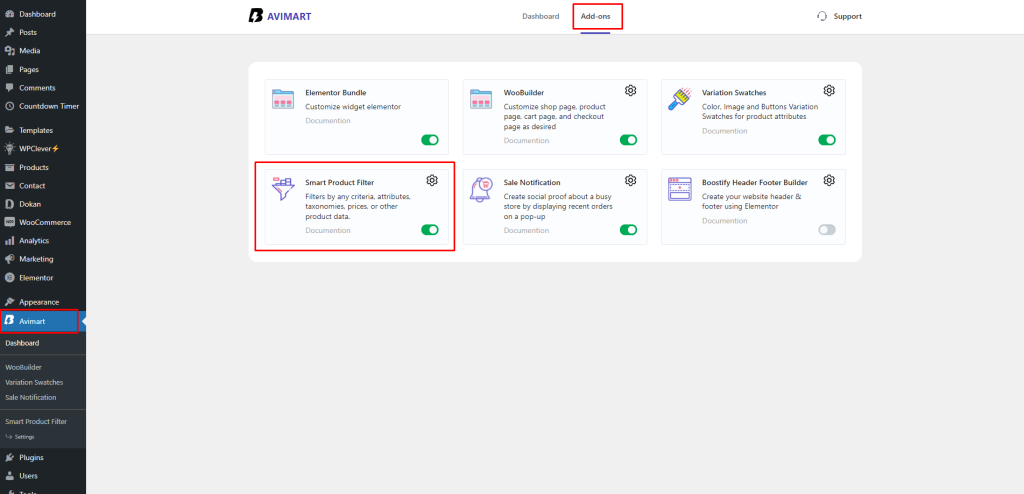
Find Smart Product Filter addon and turn it on.
Step 2: Do some settings for Woostify Product Filter
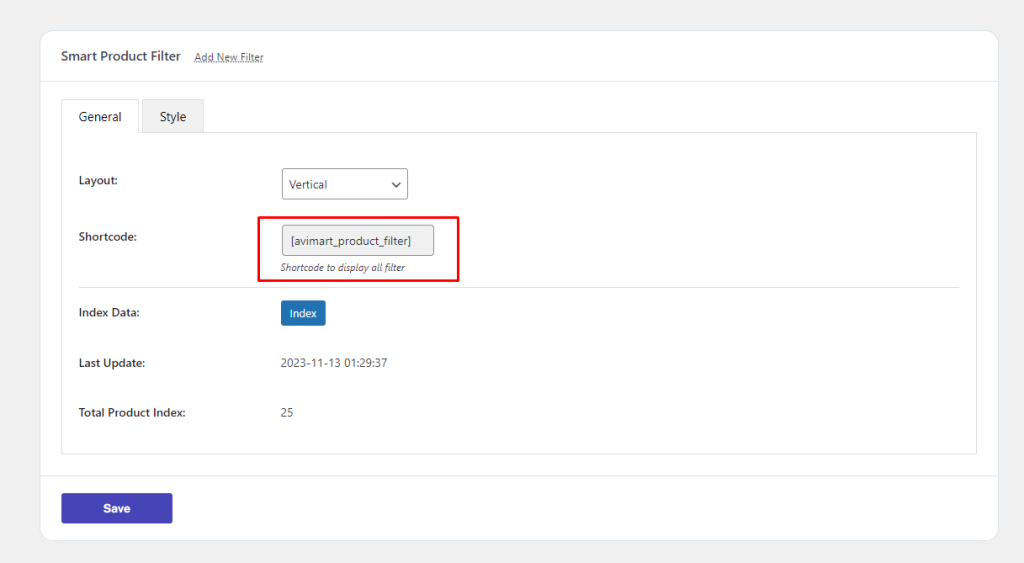
Head to the Settings, you will be navigated to a new box where you can make some General and Style settings as follows:
In the General section, you can:
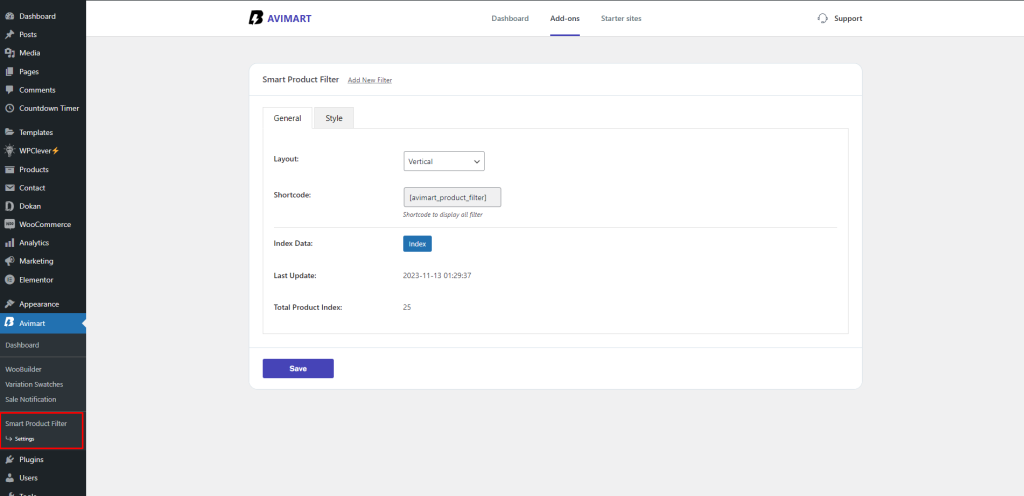
- Set the layout as Horizontal or Vertical
- Display shortcode: this section will be automatically set as avimart_product_filter
- Index Data
- Last Update: the date when you last save the product filter settings
- Total Product Index: the total number of products that are applied filters.
In the Style section, you can make changes to all options I mention below:
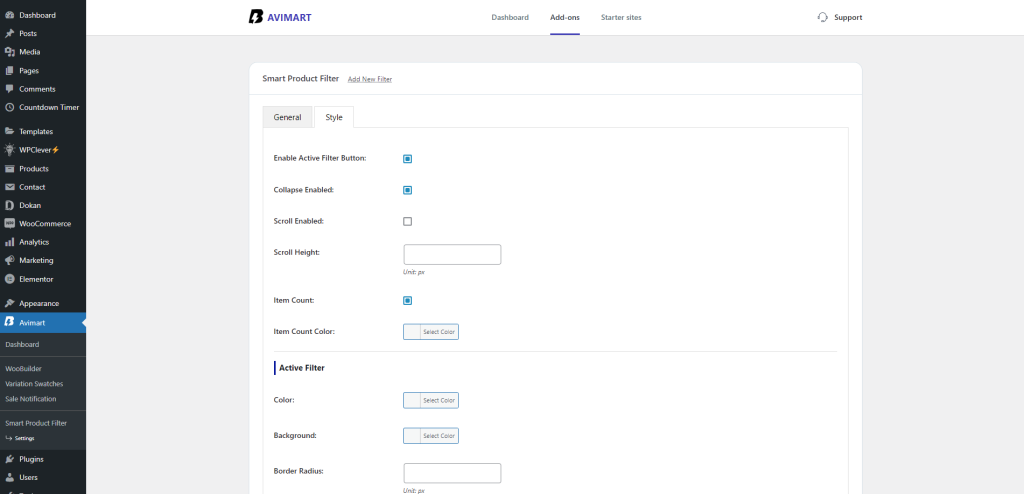
- Enable or Disable Active Filter Button option
- Enable or Disable Collapse option
- Enable or Disable Scroll option
- Change the Scroll Height
- Enable or Disable Item Count option
- Select Item Count Color
- Change the Color, Background and Border of Active Filter Title,
- Change the Color and Font Size of Filter Title and Text,
- Change the size, text color, and background color of Button
- Change the background color of Checkboxes
- Change the background color and icon color of Radio
- Change the color, background color, and border style of Input
- Change the Primary and Secondary color and the UI handle of Ranger Slider
- Change the border style of Visual
Remember to click on the Save button at the page button to update your settings
After making some basic settings for this WooCommerce product filter, you now can create a filter and include it in the searching product process.
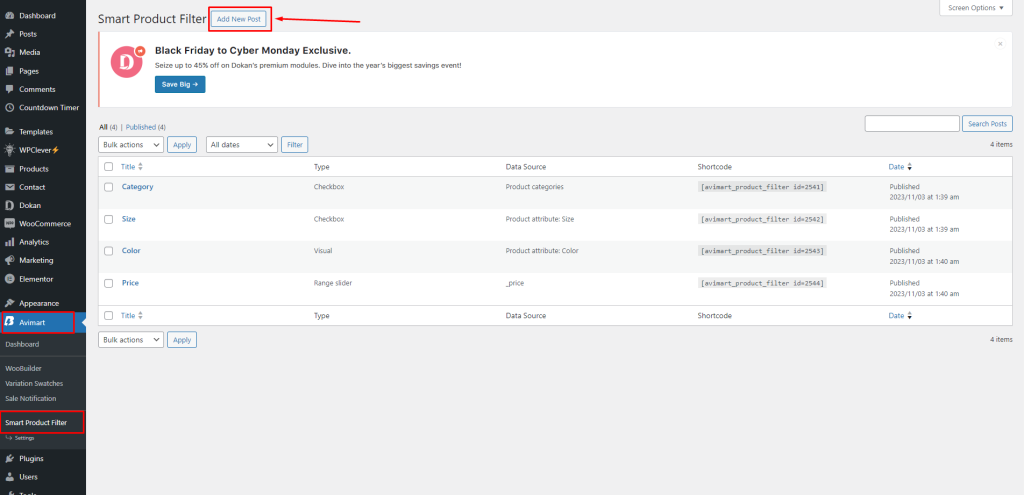
Navigate to Smart Product Filter in the menu dashboard, then click on the Add New Post button to create a new filter.
In the new tab, you need to give your product filter a name, select the Filter Type and Label.
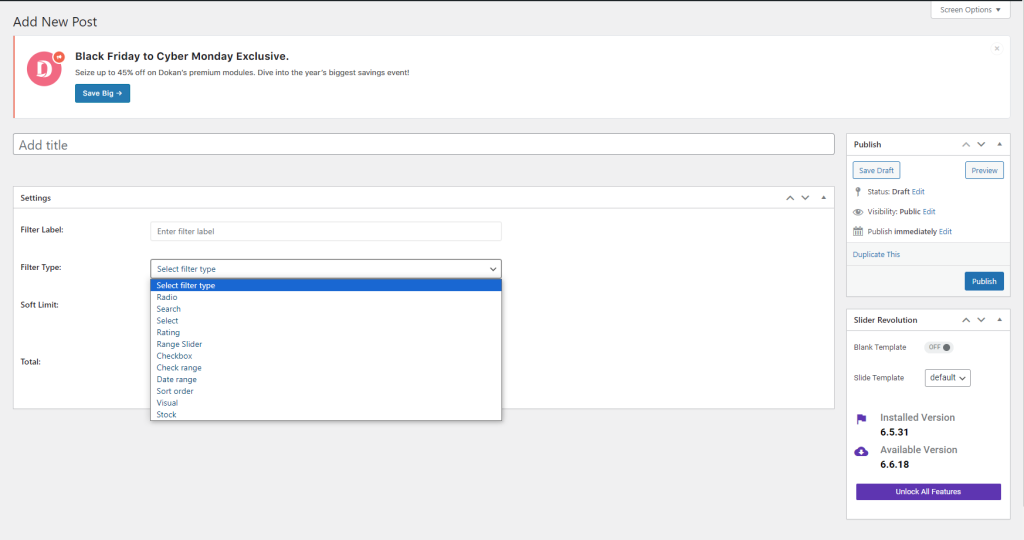
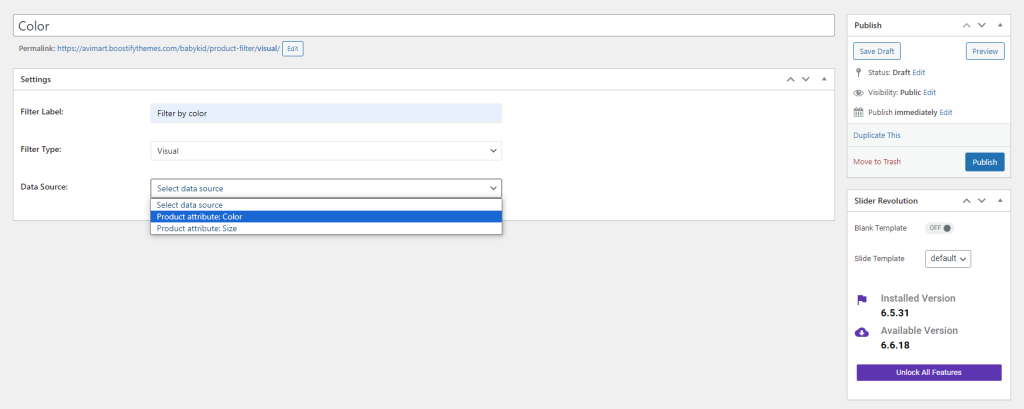
After selecting the filter type, a new dropdown menu section will appear (this will vary depending on the filter type you choose). In this example, I am creating a Visual type, so it will show Data Source for you to choose from.
Once finishing all settings above, click on the Publish button to save your product filter.
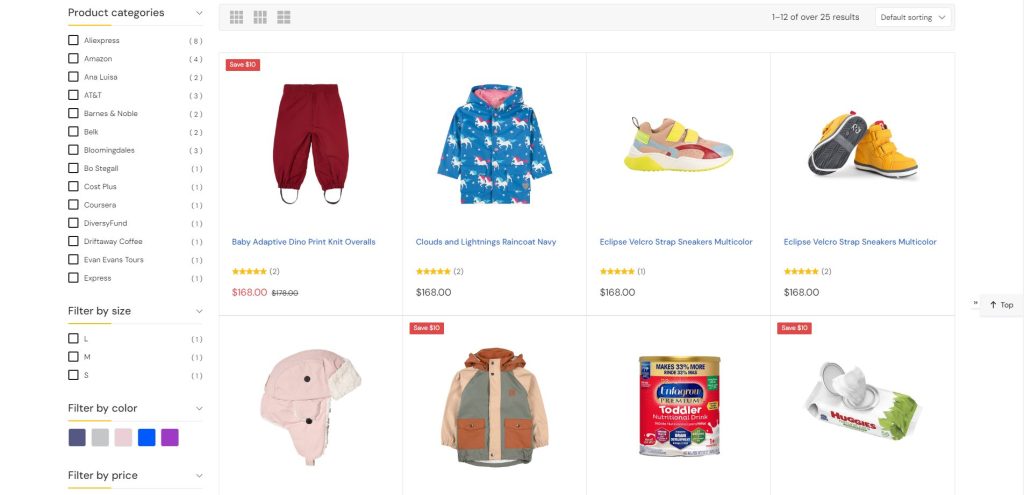
Here is the WooCommerce product filter I have created.
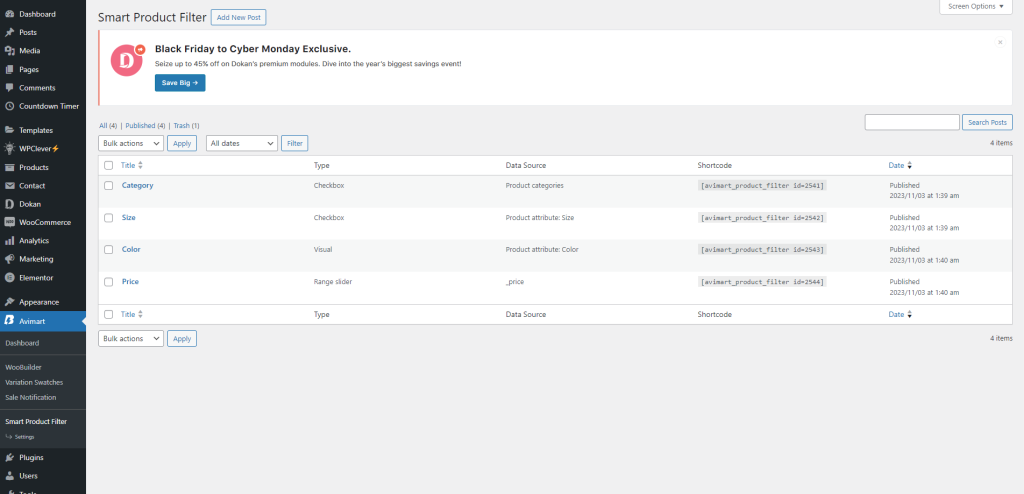
Follow the above process to add other filters to your WooCommerce store as you wish.
Step 4: Activate WooBuilder
Go to Avimart -> Add-ons, then you find WooBuilder and Activate it.

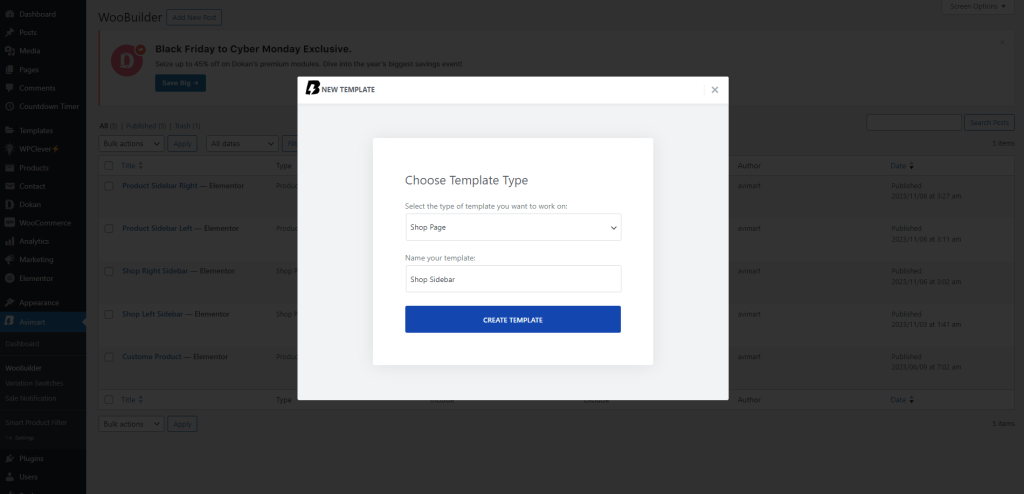
Step 5: Create a new shop page
Then, you need to create a new WooCommerce shop page, give it a name and select the type of page, then click on the CREATE TEMPLATE.
Step 6: Adding required elements to the new template
Now, you can design and customize the shop page with Elementor.
To create the product filter, you should find the Avimart – Products addon and drag & drop it to the new template.
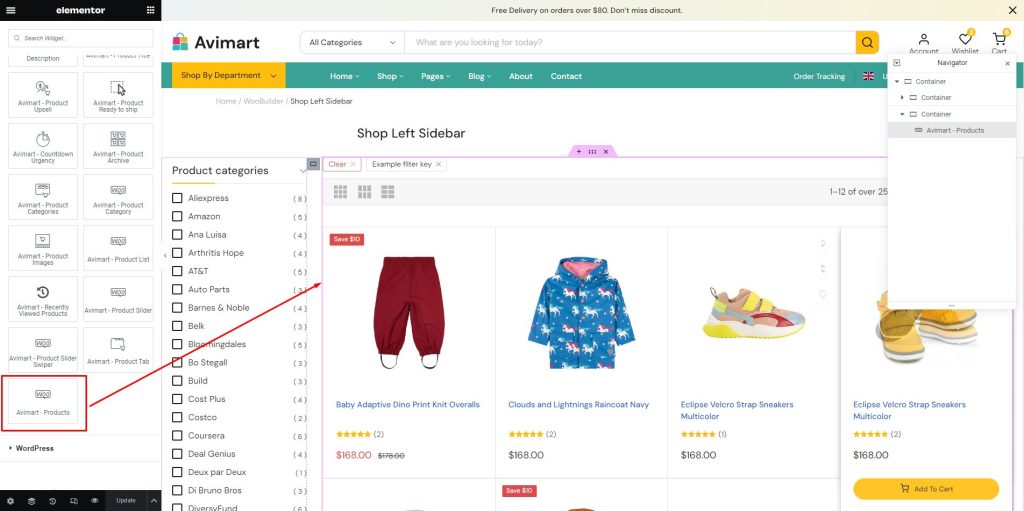
This is only one element on the shop page. You need to add more other factors to make the shop look good. For further details of creating and designing a shop page, please take a look at this guide.
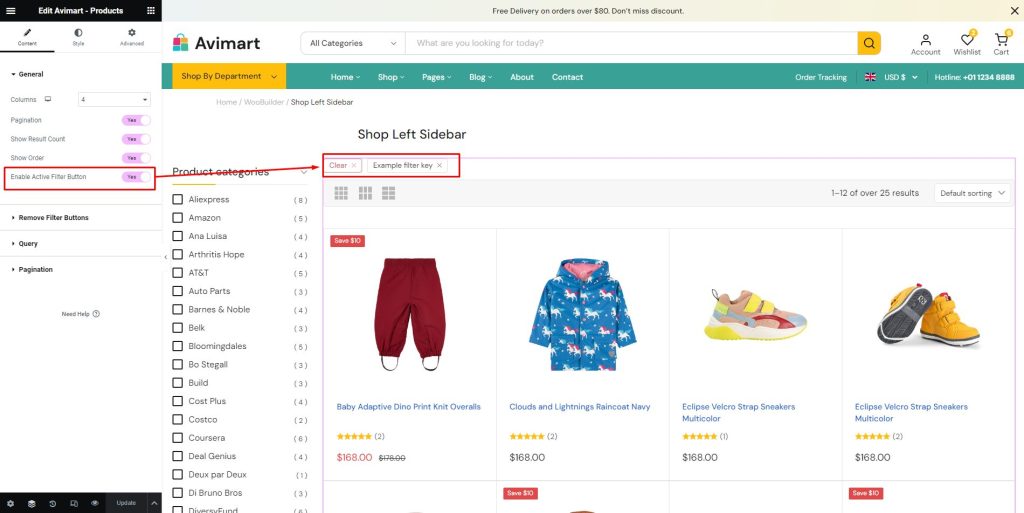
Step 7: Configure the Product filters
Then you can further customize it to fit your requirement.
- Turn on the Enable Active Filter Buttons to allows online shoppers to find out their desired items faster and more easily.
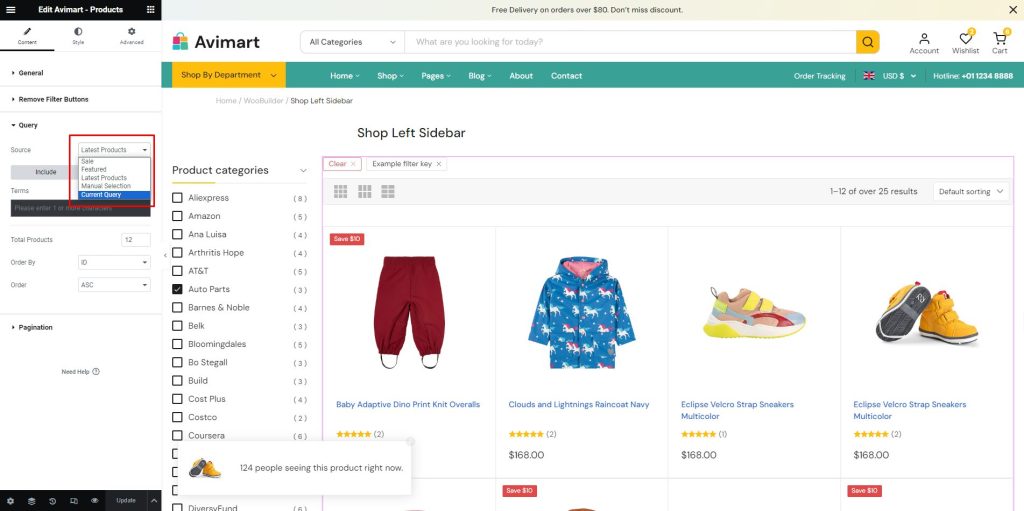
- Dropdown to the Query section, select the Current Query option to apply all product filters to this page.
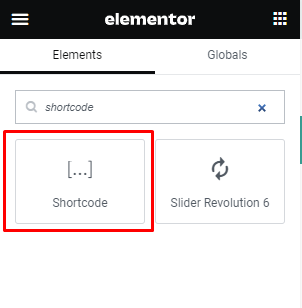
- Drag and drop the Shortcode widget to the page
Copy the Filter global shortcode (you can find it on the Filter settings page)
And paste it in the shortcode box at the left side of the screen as below:
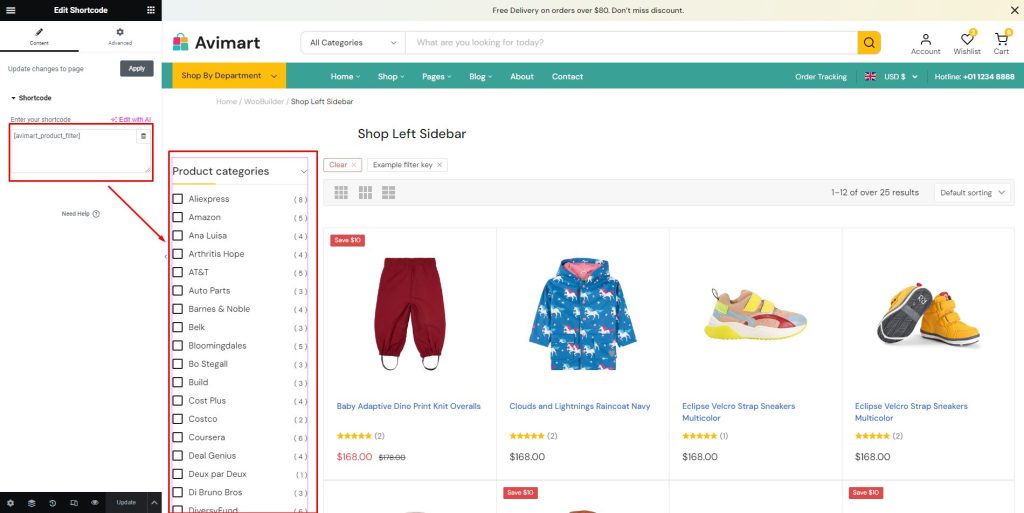
Finally, remember to save your changes by clicking on the Publish button at the page bottom.
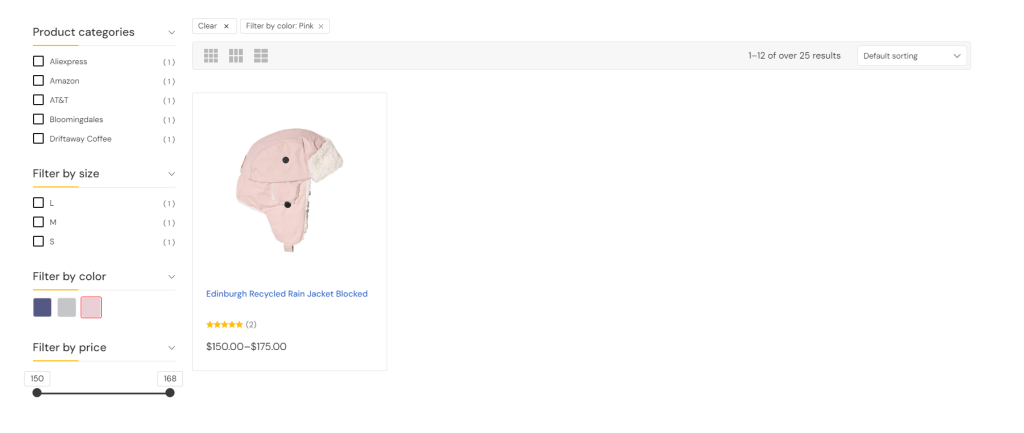
Visit the shop to check if all product filters work well on your WooCommerce store.