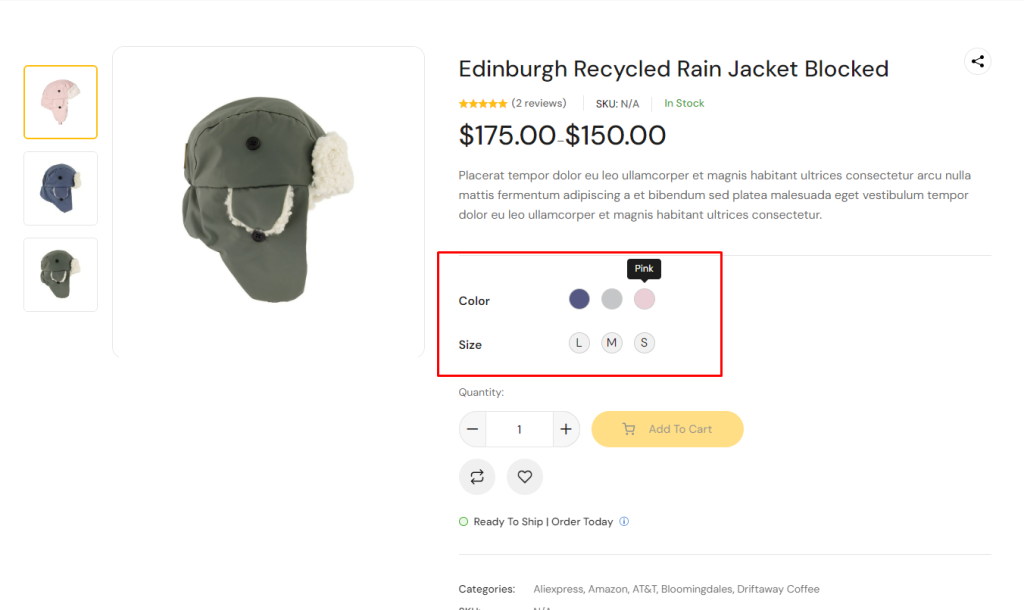
WooCommerce Variation Swatches provides a much nicer way to display variations of variable products. You can present product colors, sizes, styles, and many things in a better way which is not supported by WooCommerce.
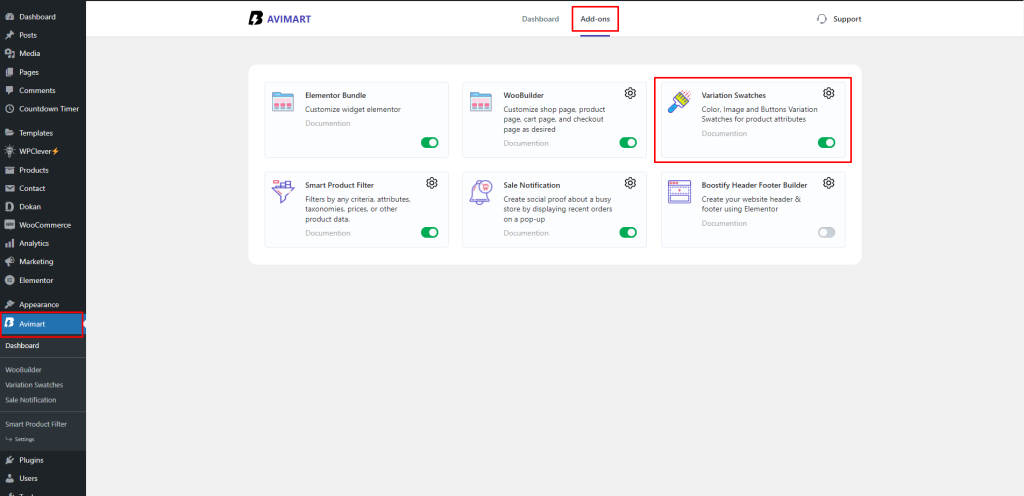
Step 1: Go to Avimart in the Add-ons, then activate Variation Swatches.
After enabling this add-on, variable products will still show dropdowns. You need to configure product attributes.
Step 2: Create Attribute Variations
1.Log in to your WordPress dashboard, navigate to the Products menu, and click Attributes.
2. Click on to attribute name to edit an existing attribute or in the Add New Attribute form, you will see the default Type selector.
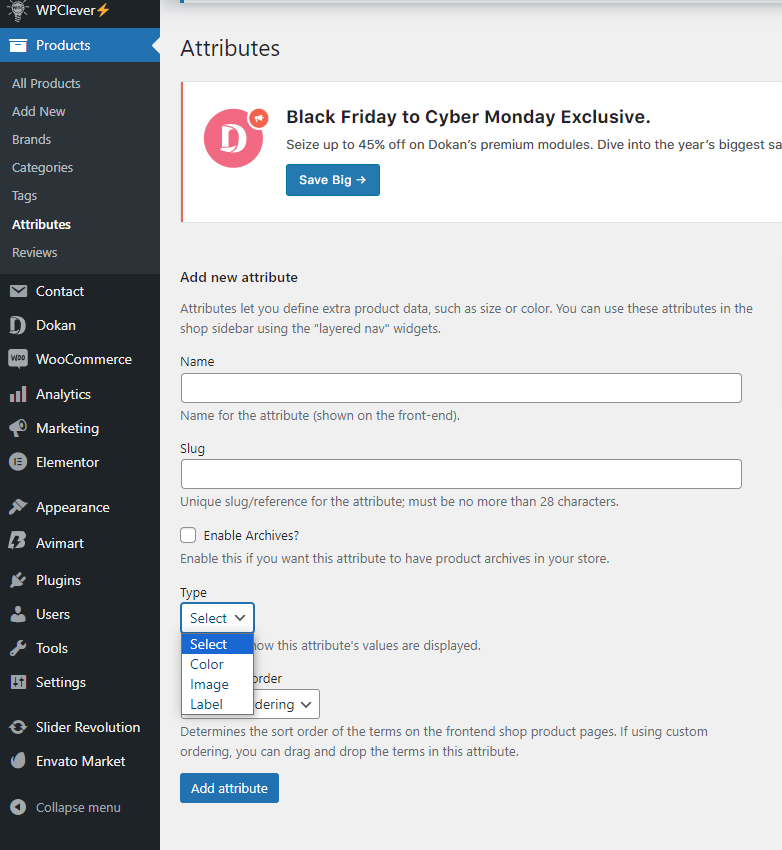
3. Click on that Type selector to change the attribute type. Besides default options Select and Text, there are more than 3 options Color, Image, and Label to choose.
4. Select the suitable type for your attribute and click Save Change/Add attribute
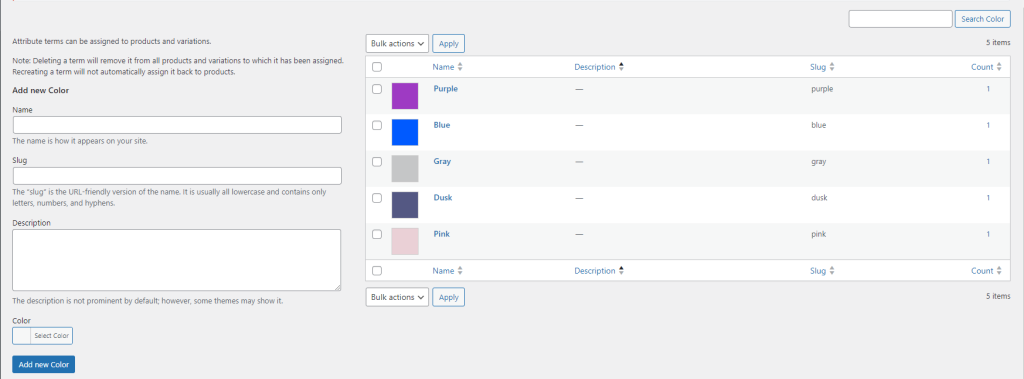
5. Go back to manage the attributes screen. Click the cog icon on the right side of the attribute to start editing terms.

6. Start adding new terms or editing existing terms. There will be a new option at the end of the form that let you choose the color, upload images or type the label for those terms.
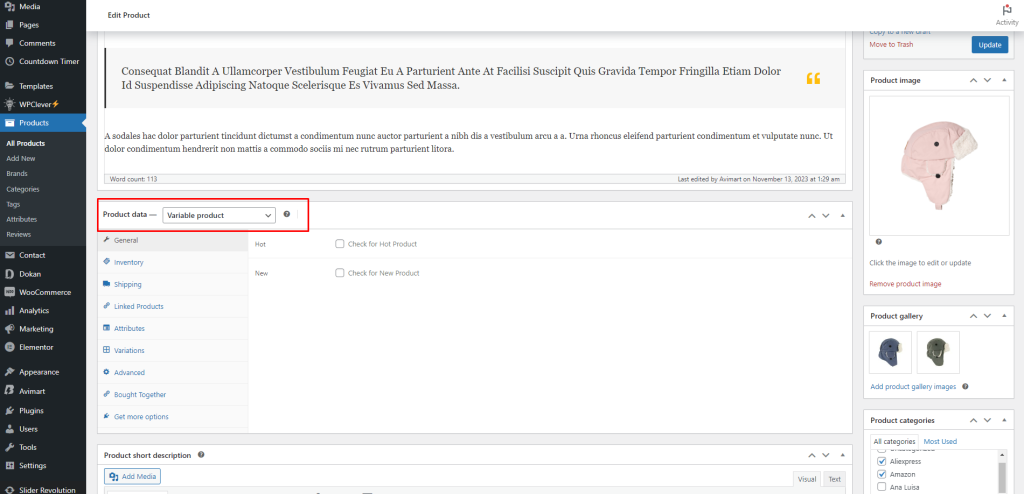
Step 3: Enable Attribute Variation in WooCommerce Variable Product
It’s time to enable color swatch inside a variable product. To enable color swatch in your desired product. Get into your desired product edit mode. Make sure you have a Variable Product selected from Product Data.
After selecting the Variable Product from Product Data dropdown, head to the Attributes Tab. Click on Add existing dropdown. In this dropdown, you can see all your globally created attributes. As we’ve created a color and size attribute, it’s now showing the color and size attribute.
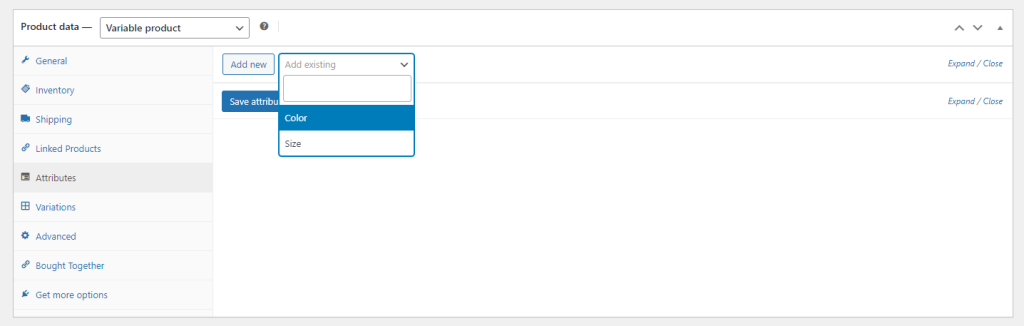
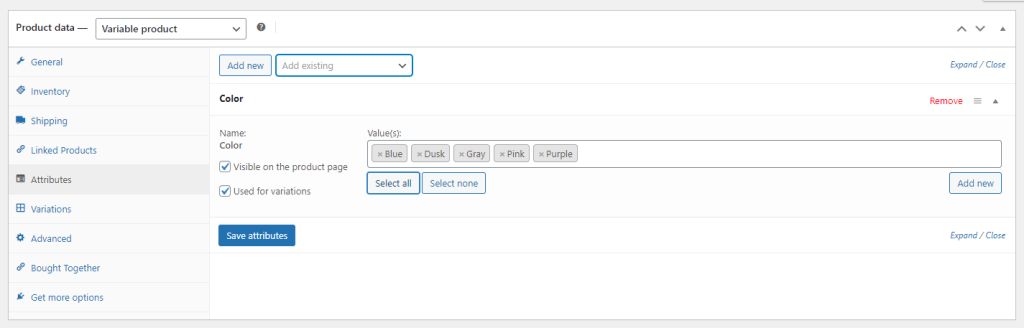
Now select the Color attribute and click on Add. You can see the following screens appears afterward.
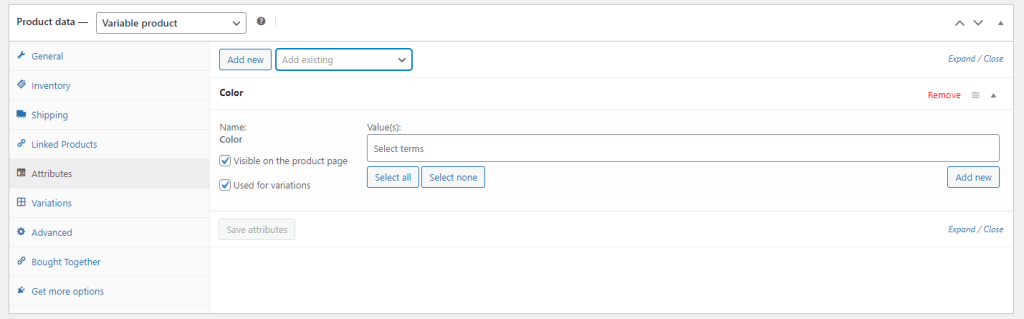
If you want to select all available variations of the color attribute, click on Select all button. If you want to deselect all selected variations at once, click on Select none button. Add all variations by selecting Select All button, checked Used for variations settings, and click on Save Attributes button. Check the following screenshot for guideline.
Now get into Variations tab. Here you will notice two buttons. First one is Generate variations and the second one is Add manually.

In this tutorial, I am going to click Generate variations button. It’ll add all available variations like the following.
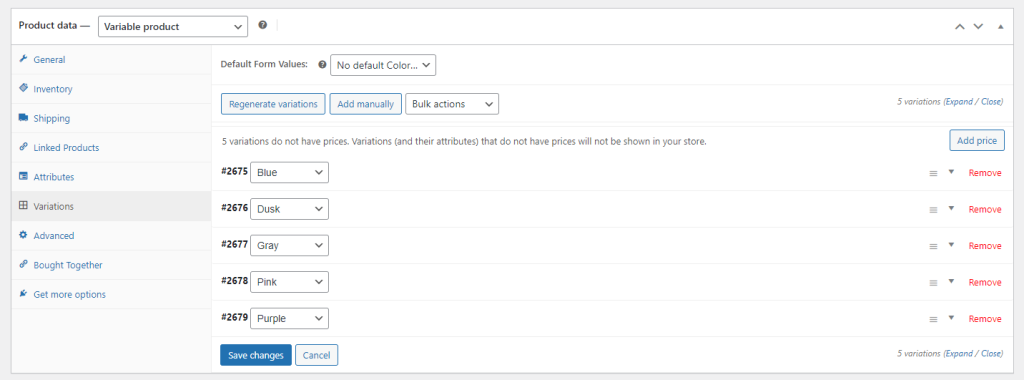
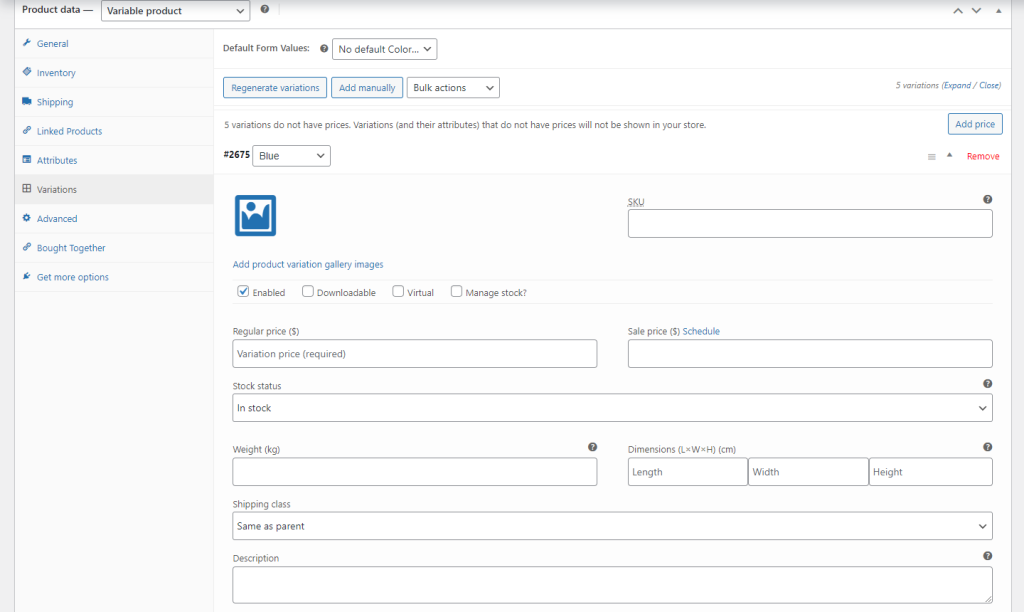
You can see in the image above that Blue, Gray, Pink,… color variations are there. From this screen, you can add variation images, prices, and other specific details. When you have done adding all your required details in each variation, click the Save Changes button.
Remember! Don’t forget to add the price in each variation, otherwise, variation won’t be visible on the product frontend.